Web Office Permissions
Different areas of the Web Office have permissions which allows you to assign access to certain tasks and delegate responsibilities to other members of your organisation.
There are 4 main areas where permissions can be assigned to users. They are as follows:
-
Site Manager - The majority of permissions are granted in this area. Determines who can publish what on your web site, who can modify the database and who can use the organisational management features e.g. Mailing.
-
Site Settings - Grants administrators access to the settings area including access to the template area to modify the site design.
-
Resources - The resource booking feature has its own permission set. For details on granting these permissions see resource booking.
-
Shop - Grant permissions to users to manage the shop. For details on how to grant these permissions see shop security permissions.
Site Manager Permissions
The
site manager area has a flexible permissions section which enables delegation of the management of different areas of your web site.
The quickest method for assigning site manager permissions will depend on if you are assigning permissions for just
one individual across the site or for
a
specific group.
Granting Site Manager Permissions across a group
Granting Site Manager Permissions to an individual
How Site Manager permissions work
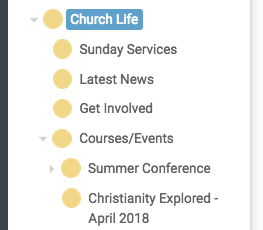
If a user does not have any permissions on a  group folder of the site manager the folder will not be visible to them in the Web Office.
 |
|
In the illustration on the left the user has permissions on all the sub groups under church life, so this is what they will see in the site tree.
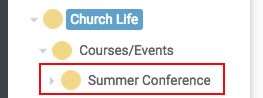
The view shown to the user on the right is of someone who just has permissions within Summer Conference area of this web site, so will see a limited view of the group tree. The other groups, (Church Life and Courses and Events) are only visible to allow access to Summer Conference a user granted permissions at this level wouldn't be able to perform any actions in those other areas. |
|
 |
A few simple rules enable permissions to be easily granted across the site manager area. These rules are as follows:
 Assign permissions you already have - You can grant to other people a permission you already have for a particular group. Any permission you do not have will not be visible.
Permissions are inherited by sub-folders - Having a particular permission automatically gives you the same permission for all sub-folders.
The advantage of this approach is that the web site administrator need only be granted permissions in the contact database (root) level in order to be able to edit content for any group in the site manager. Similarly the person responsible for a particular area need only be granted all permissions in that group to be able to administrate all of the sub-groups below.
You may have noticed that often particular permissions can't be deselected for some users. This is because these permissions have been granted at a higher level in the group structure so the permission was inherited by this group. To remove the permission you must therefore remove it at the group where it was granted. If you're not sure which group this was you can view the individuals permissions through their permissions tab to view where the permission was granted (see the granting permissions to an individual section for more details on obtaining a view of an individual user's permissions).
Site Settings permissions
The
site settings area of the Web Office (accessed by selecting the
settings tab) has it's own permissions. The standard permissions that can be granted in this area are:
-
Theme Park access – the ability to edit the theme and layouts under the Site Design section of the site.
-
Template access – the ability to edit templates if they are available on your site.
-
Insert/Edit modules – the ability to insert modules in articles under the Site Manager.
-
Full Administrator – the ability to edit all areas under Settings
-
Finance Admin – the ability to manage payment group settings and set up the payment processor account
-
View Reports – the ability to access reports on site data
Granting permissions to the site settings area
-
Log in to the site and click on the Settings cog on the left hand side navigation

-
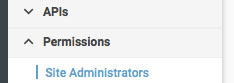
Click on the Permissions dropdown and then select Site Administrators a list of the people with permissions in this area will become visible shortly afterwards.
-
If the person you wish to grant permissions to doesn't appear in the list of people click the
 button at the bottom right; a new window should appear for you to choose your members
-
Tick the relevant permissions required and save the page.

Resource Permissions
The Resources section of the Web Office (accessed by selecting the resource icon from the left hand navigation) also has it's own permissions.
The standard permissions that can be granted in this area are:
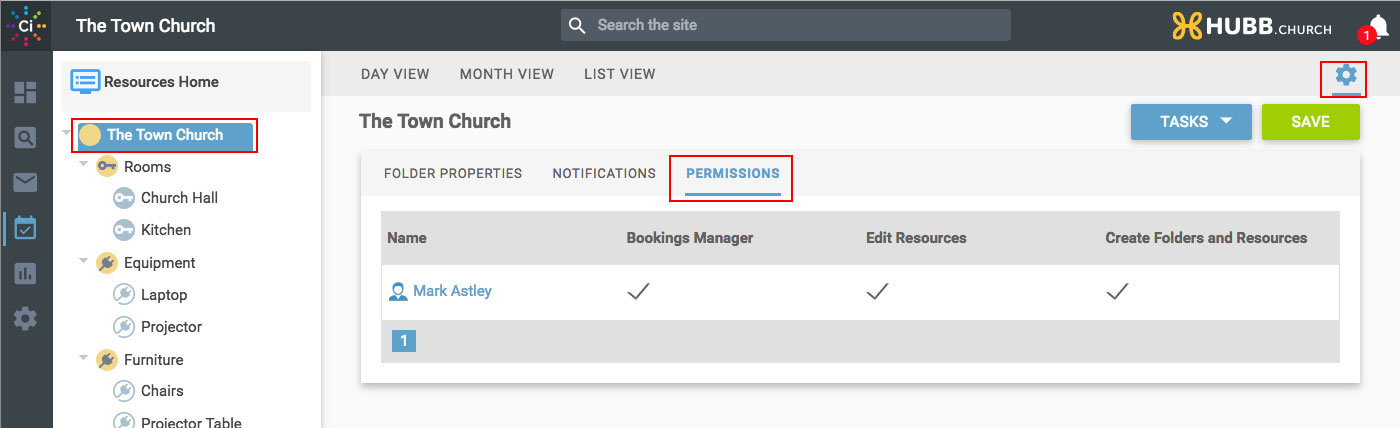
Booking Manager – allows the user to approve and manage bookings.
Edit Resources – allows the user to edit currently available resources.
Create Folder and Resources – allows the user to manage the whole of the booking area and create new groups of resources as required.
Granting permissions to the resources area
-
Log in to the site and click on the Resources icon
 on the left hand side navigation.
-
Click on the resources root group.
-
Click on the Settings cog on the top right
 of the page.
-
Click on the Permissions tab, if the person you wish to grant permissions to doesn't appear in the list of people click the button at the bottom right, or select the task to 'Add a person to this list' from the blue task button; a new window should appear for you to choose your members
-
Tick the relevant permissions required and save the page.
 Tips
Tips
-
Be cautious about granting permissions on the root group as a permission granted to someone means they have that permission throughout the entire site. Only a few users should be granted permissions at this level.
-
Think about granting your group leader permissions at the appropriate group level so they can manage their area of the site. Assigning all permissions to the group leader would be normally advised. They can then delegate certain responsibilities by granting permissions to their team - remember they can only assign the permissions they have. Group leaders will need training using the system to manage their own areas but it'll empower them to run their department and will create less work for the site administrators in the long term.