Viewing New Form Responses
When you have a new form response in the web office you will see there is an alert symbol  next to the name of the group.
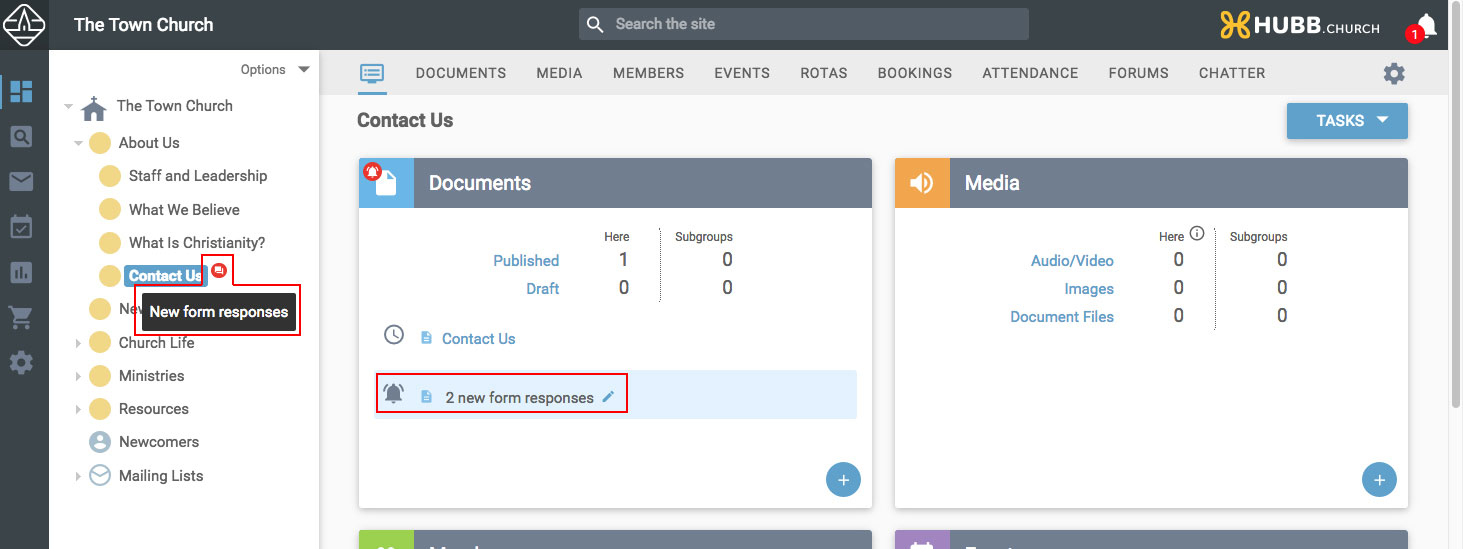
You can click either on the edit button under the Document section, or on the Documents tab, and this will show you the article that has the notification.
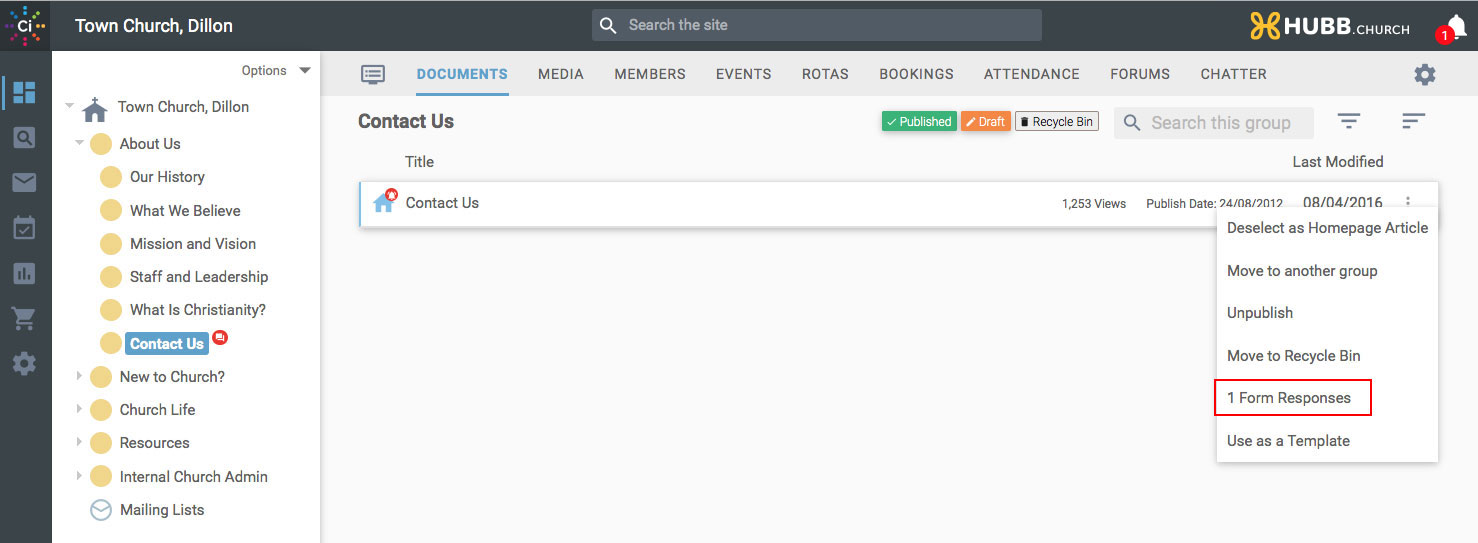
Next to the document title there will be an icon showing the number of form responses on this article. The icon will be red  if there are any new responses, or orange
  if all the responses have been dealt with.

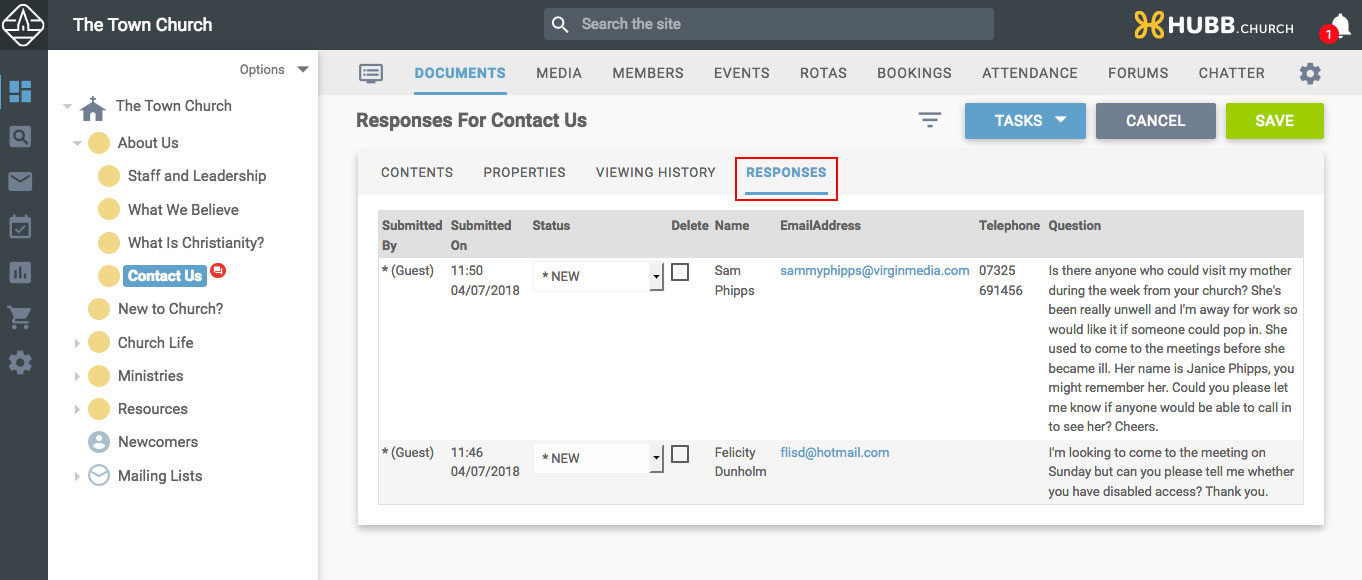
Open the article and there is a tab for 'Responses' along the top. Click on this to view the responses you've received.
 You can still view the responses via the dropdown under the quick options menu (the three dots to the right of the article name) if required…
Review the response and change its status to one of the options supplied in the drop-down.
If you wish to export the information select the required format from the list of tasks shown under the task button on the top right.
If you would like to delete the response(s), check the box of the responses you wish to remove.
When you've reviewed the responses, set the status as required and selected any responses you wish to remove, click save to commit your changes.
Setting up notifications to email you form responses
Go the Jobs section on the dashboard view of the group containing the form, this is the last panel on the dashboard view.
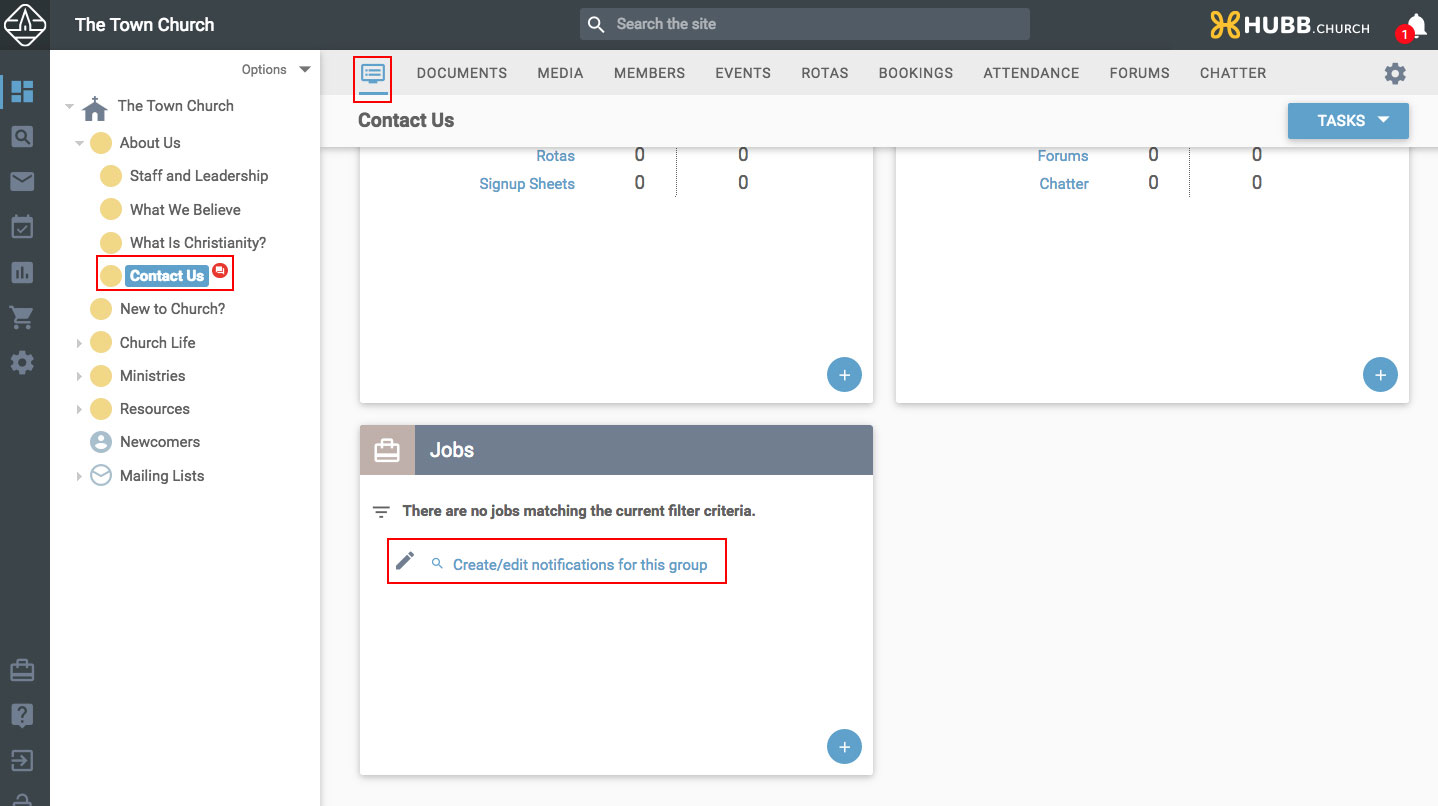
Click on the option to Create/edit notifications for this group. You will be taken to the notification pop up.
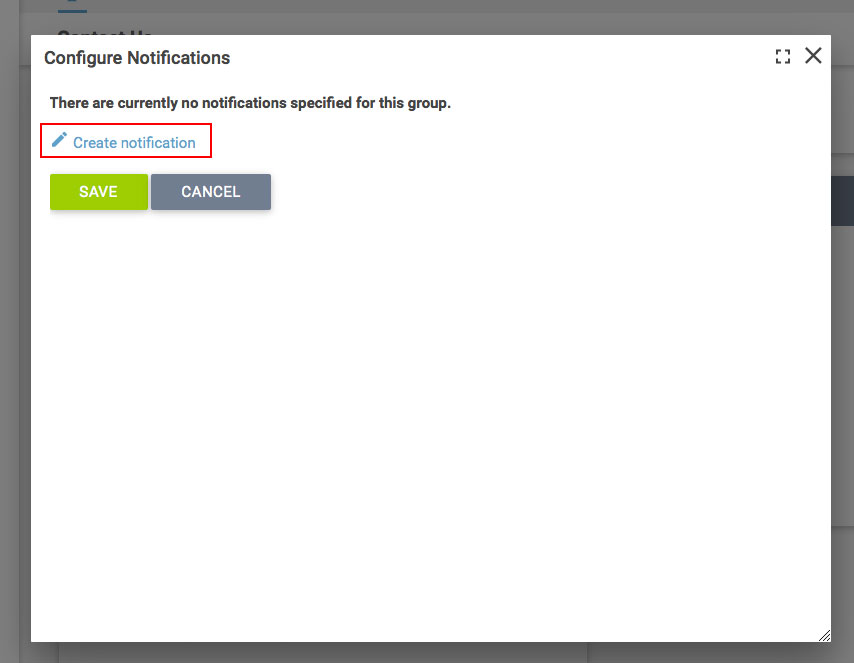
From here you can click to 'Create notification'. Then fill in the fields required, specifying the task as being 'Document Form Response', select the name of the form and that you want to send an email, and then choose a person you want to receive the notification. If you have no users in this group you can navigate to the root group to choose your user.
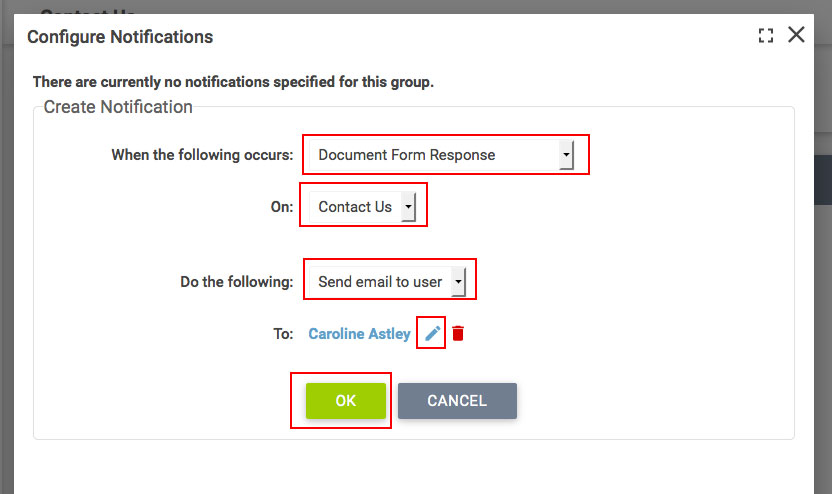
Click on Ok, and on Save on the next pop up and the member chosen will then receive an email to notify them when the form is next submitted.