Appendix B: Check-in Usage Examples
Check-in is incredibly flexible, but here are a few examples of how you might want to use Check-in.
 |
Simple Registration
Hardware
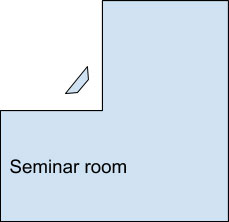
Event setup in Web Office
-
The event has been added to the group that contains all the expected attendees
Check-in Settings
Event flow
-
Attendees arrive, search for themselves by name or phone number and tap Check-in to register & check-in. They are marked as attended.
|
 |
Simple Child Check-in
Hardware
-
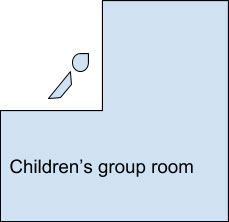
An old laptop with a USB label printer outside the Sunday school room
Event setup in Web Office
-
Recurring “Sunday School” event is added to the Children’s group that contains all children and leaders
Check-in Settings
-
Default, but with the default Profile set to “Default – Child Check-in” in Global Check-in Settings
Sunday flow
-
Parents bring children to the Sunday school as they arrive at church
-
Parents search by name or phone number and print labels
-
Children are automatically marked as checked-in
-
Guests can register
-
Guardians receive a security pick-up label
-
At the end of the service, parents present their pick-up label, which is matched to their child’s label to collect the child
|
 |
Child Check-in with separate Registration & Check-in
Hardware
-
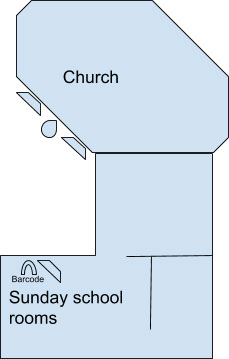
Two laptops and one USB label printer in the church entrance lobby
-
One laptop and a barcode scanner at the entrance to the Sunday school rooms
Event setup in Web Office
-
Recurring ‘Sunday School’ event is added to the Children’s group that contains all children and leaders
Check-in Settings
-
Default Profile set to “Default – Child Check-in”
-
Separate Registration & Check-in enabled
Sunday flow
-
Parents register children on arrival at church using the laptops in the lobby and print labels
-
Children are only marked as Registered, not checked-in
-
Guests can register
-
Guardians receive a security pick-up label
-
Children then go in to church for the first part of the service
-
When the children go to their groups, their labels are scanned as they go to the Sunday school rooms and they are marked as Checked-in
-
At the end of the service, parents present their pick-up label, which is matched to their child’s label to collect the child
-
The child’s label is scanned again to check them out and the parent notified of any incidents that were recorded during the event
|
 |
Large scale Child Check-in
Hardware
-
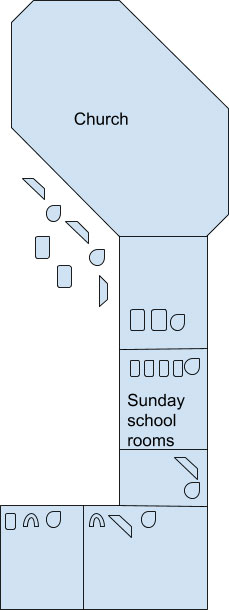
Multiple laptops / All In One PCs / iMacs / Chromebooks / tablets for registration
-
Multiple networked label printers for registration and in each room for label re-printing, connected to a single computer in a back office that has the Hubb Print Connector installed on it
-
Children’s groups check-in children using:
-
Laptop & barcode scanner, or
-
Mobile and QR code scanner, or
-
Mobile and bluetooth barcode scanner, or
-
A few tablets used to check-in manually on the register
-
Every table leader uses their mobile phone to check-in their table of children manually on the register
Event setup in Web Office
-
Recurring ‘Sunday School’ event is added to the Children’s main group, with multiple sub-groups added - one for each small table group within each age range
Check-in Settings
-
Separate Registration & Check-in enabled
-
Custom Check-in profiles for each age range, with different label requirements for each:
-
Creche requires a full child label + guardian label + nappy bag label
-
Young children’s groups just need the child label and guardian label
-
Youth groups just have a name label printed for the children with no security features
Sunday flow
-
Parents register children on arrival at church using the laptops in the lobby and print labels
-
Children are only marked as Registered, not checked-in
-
Guests can register
-
Guardians receive a security pick-up label
-
Children then go in to church for the first part of the service
-
When the children go to their groups, either:
-
their labels are scanned as they go to the Sunday school rooms and they are marked as Checked-in
-
Or they are manually marked as checked-in by their table leader using the register
-
At the end of the service:
-
parents present their pick-up label, which is matched to their child’s label to collect the child
-
The child’s label is scanned again to check them out (or this done manually via the register) and the parent notified of any incidents that were recorded during the event
-
Youth check themselves out using a tablet before they leave
|
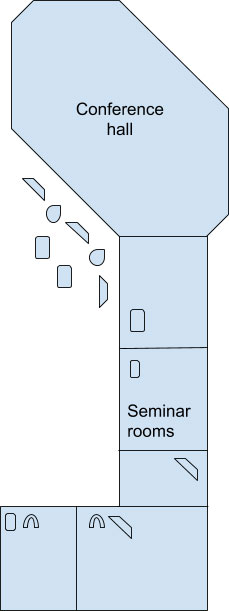 |
Large scale conference
Option 1: Scan e-tickets
-
Set up a payment group in advance where delegates purchase tickets and are emailed e-tickets to print and bring with them on a PDF template of your choice. (The template could instruct the delegates to cut and fold their e-ticket into a lanyard badge.)
-
On arival at the conference, use smartphones to scan the e-tickets to check-in the delegates
-
At the seminar rooms, use smartphones to scan the e-tickets to check-in the delegates
Option 2: Register and print labels on arrival
Hardware
-
Multiple laptops / All In One PCs / iMacs / Chromebooks / tablets for registration
-
Multiple networked label printers for registration, connected to a single computer in a back office that has the Hubb Print Connector installed on it
-
Seminar rooms check-in delegates using:
-
Laptop & barcode scanner, or
-
Mobile and QR code scanner, or
-
Mobile and bluetooth barcode scanner, or
-
Tablets or mobiles manually on the register
Event setup in Web Office
-
The Conference event is added to the main group containing all attendees, with multiple sub-groups added – one for each seminar
Check-in Settings
-
Default (Conference) profile assigned to main group (prints name label)
-
Default (no label) profile assigned to seminar groups
Event flow
-
Delegates register on arrival using the computers / tablets in the lobby and print labels.
-
When attending each seminar, the delegate scans their label to check-in to that seminar (or the seminar facilitator marks them as checked-in manually with a phone or tablet on the register)
|