Adding an Interactive Map to your Site
There are two ways of adding a map to your site; if you'd like to just add a map to your article there's the add module button in the article editor. If you're working on a more complex layout - like your web site homepage there's a also a map component in the layout editor.
Pinpointing your office/venue location
-
Open the article where you will be adding the map.

-
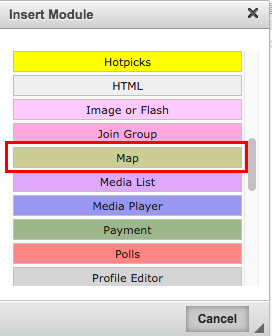
Place your cursor at the appropriate location in the article then click the add module button, and select the map module.
-
The module will be added to your article and there'll be a new window to allow you to change the map settings.
-
Change the Component Settings to set who can see this map, adjust the margin around the component and toggle the component title and footer bars.
-
Change the Map options to select which map controls are available. "Where's my nearest" allows users to enter a city name or Post/Zip Code to locate the nearest pin if there's multiple pins displayed.
-
Display location sets the location and zoom level for the map when its loaded for the first time. Click the Choose button to locate a region and zoom level to display. You can always adjust the scale option afterwards and press the preview button to see the effect.
-
Finally add the marker for where your church is located. Use the fixed point option in this instance and click add. A new marker will be added to the list but with no location set.
-
Enter the title for your marker and a description if required. You can also select a letter, A-Z, to be added to the marker itself.
-
Click the edit button to add your pin to the map; a good tip is to enter a Post/Zip Code into the search box, then switch to aerial view and click on the map to improve the position of the pin if needed. Click the OK button once your pin is in the correct place.
-
Repeat the process to add further pins if required.
-
Finally, use the Preview button to check your map settings before clicking OK to close the component settings window.
Here's an example; this map shows the location of the UK Endis office:
Showing Event Locations
Another example of how you could put the mapping component to use is to plot the location of your small group meetings on a map.
-
Go to the article in which you wish for the map to appear.

-
Place your cursor at the appropriate location in the article then click the add module button, and select the map module.
-
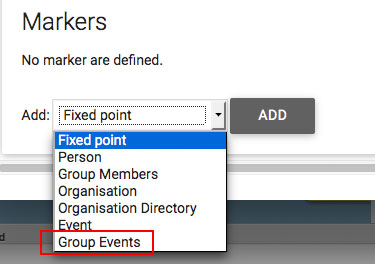
The options available are identical to the example given above, however in this instance select the group events option in the markers area and click add.
-
Click the edit button to select the group where your events are stored; you may also want to check the include child groups option if some of the events are stored in sub-groups.
-
Use the preview button to check your map settings before clicking OK to confirm your choices.
Note: it'll take a little while to plot all the locations onto a map so you may want to test your new article a little later.