
Contents:
Introduction
Following the launch of our online giving feature, we are pleased to give you a demo and share the setup instructions.
You will receive the funds in your nominated bank account after 7 days. All the transactions made in any one day are batched together, and you can get a detailed breakdown of the transactions through your website in the Finance area of your web office.
There are some countries that Stripe does not support. Please
see here for further info:
We advise playing the video in full-screen mode.
Sorry, your browser is unable to play this type of file.
You can still
download it
Setup Instructions
Get a Hubb Processing account
You will need to have the 'Payment Processor Admin' permission to do this.
You can progress onto the next setup steps straight away, without having to wait until the processing account is verified. It just means the funds taken will not go into your account until it is verified.
Please Note:
Have the following documents ready for at least one person who has a reasonable level of authority to represent the organisation i.e. vicar, treasurer, senior staff member. You do not need to add ALL the people involved, one or two key people will normally be enough.
-
ID (one of)
-
Document (one of)
-
Utility bill
-
Bank statement
Document guidelines:
-
Must be dated within the last 6 months
-
Must be different than the document used for proof of ID
-
Incomplete or cropped documents not accepted
-
Must have exactly the same address as you use as your registered business address when creating the account.
|
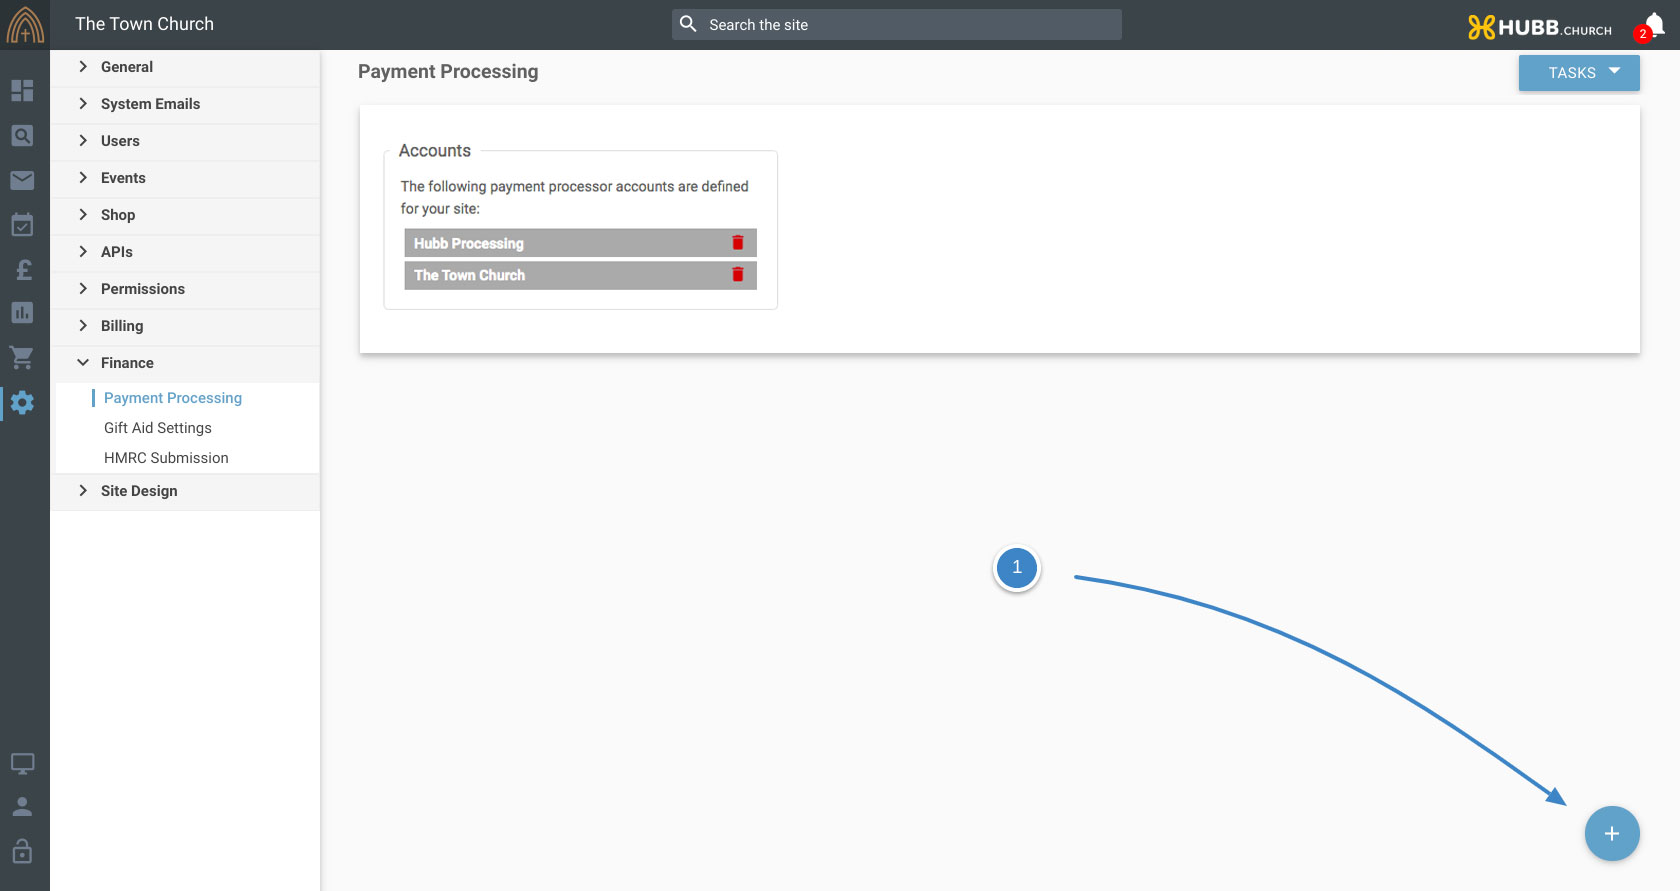
1) Add new payment processing account
-
Go to Site Settings > Finance > Payment Processing
-
Click on the Plus button to add a payment processing account
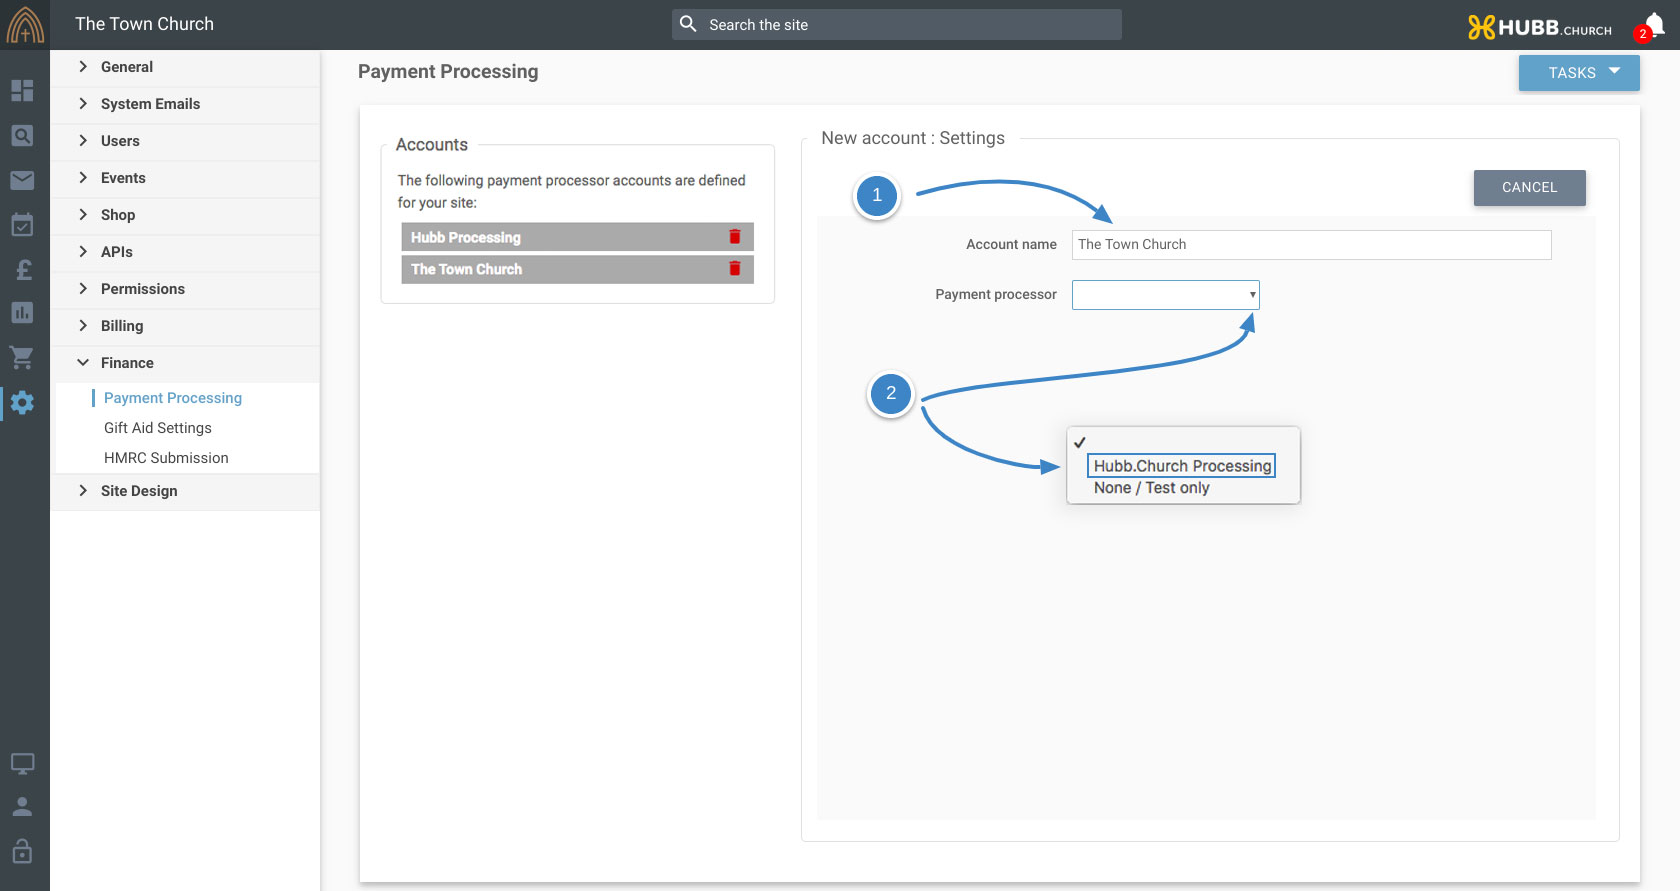
 2. Account name and type
-
Add your account name, this can be the name of your church or website, if you are going to use several accounts to transfer money into different bank account just make sure it's clear which account is for which purpose. You will need to select the correct payment processor account in the payment groups you create so you need to name them accordingly.
-
Pick "Hubb Processing" from the payment processor dropdown menu
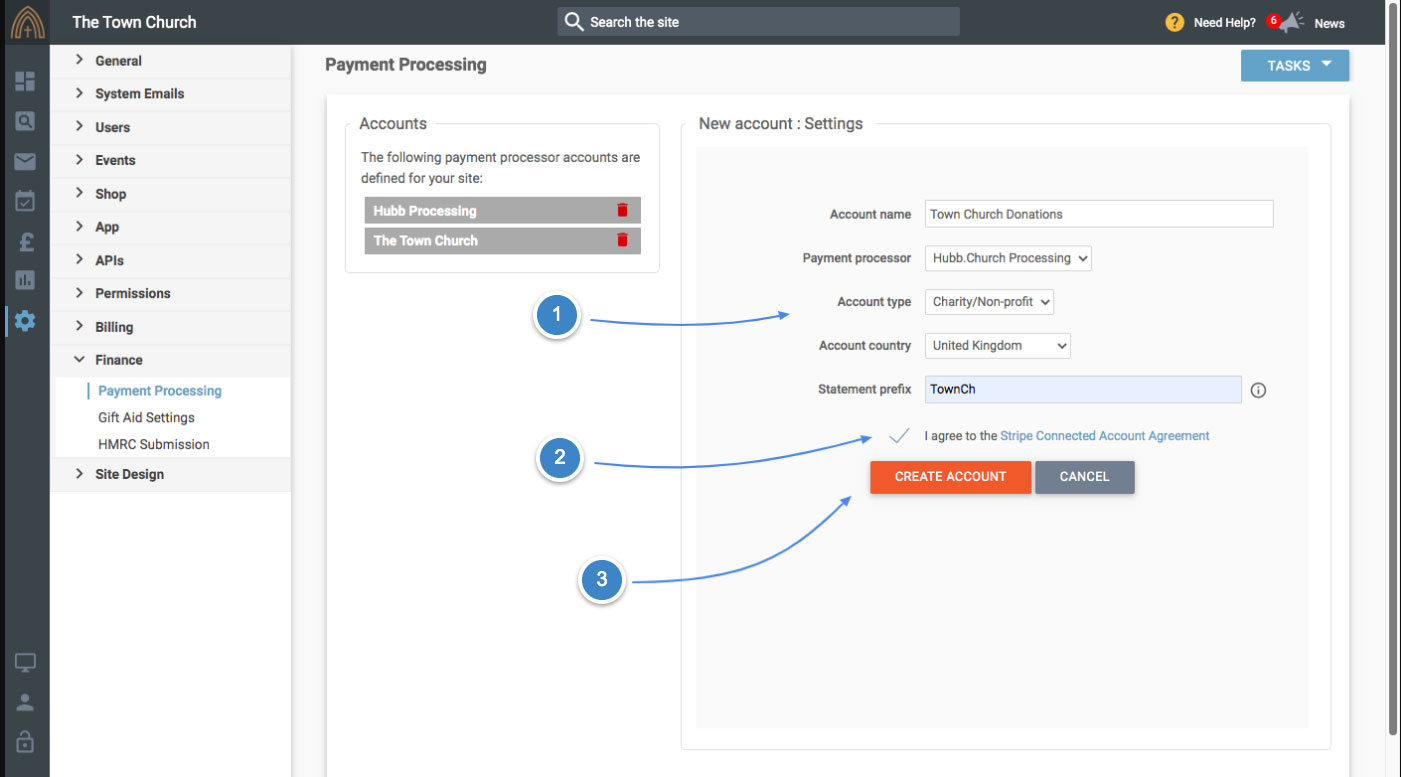
 3. Complete the account details
-
Fill in the details
-
Tick to agree to the terms and conditions
-
Click "Create Account"
|
Please note: The charity name on your verification documents needs to exactly match the name listed on the charity commission website. |
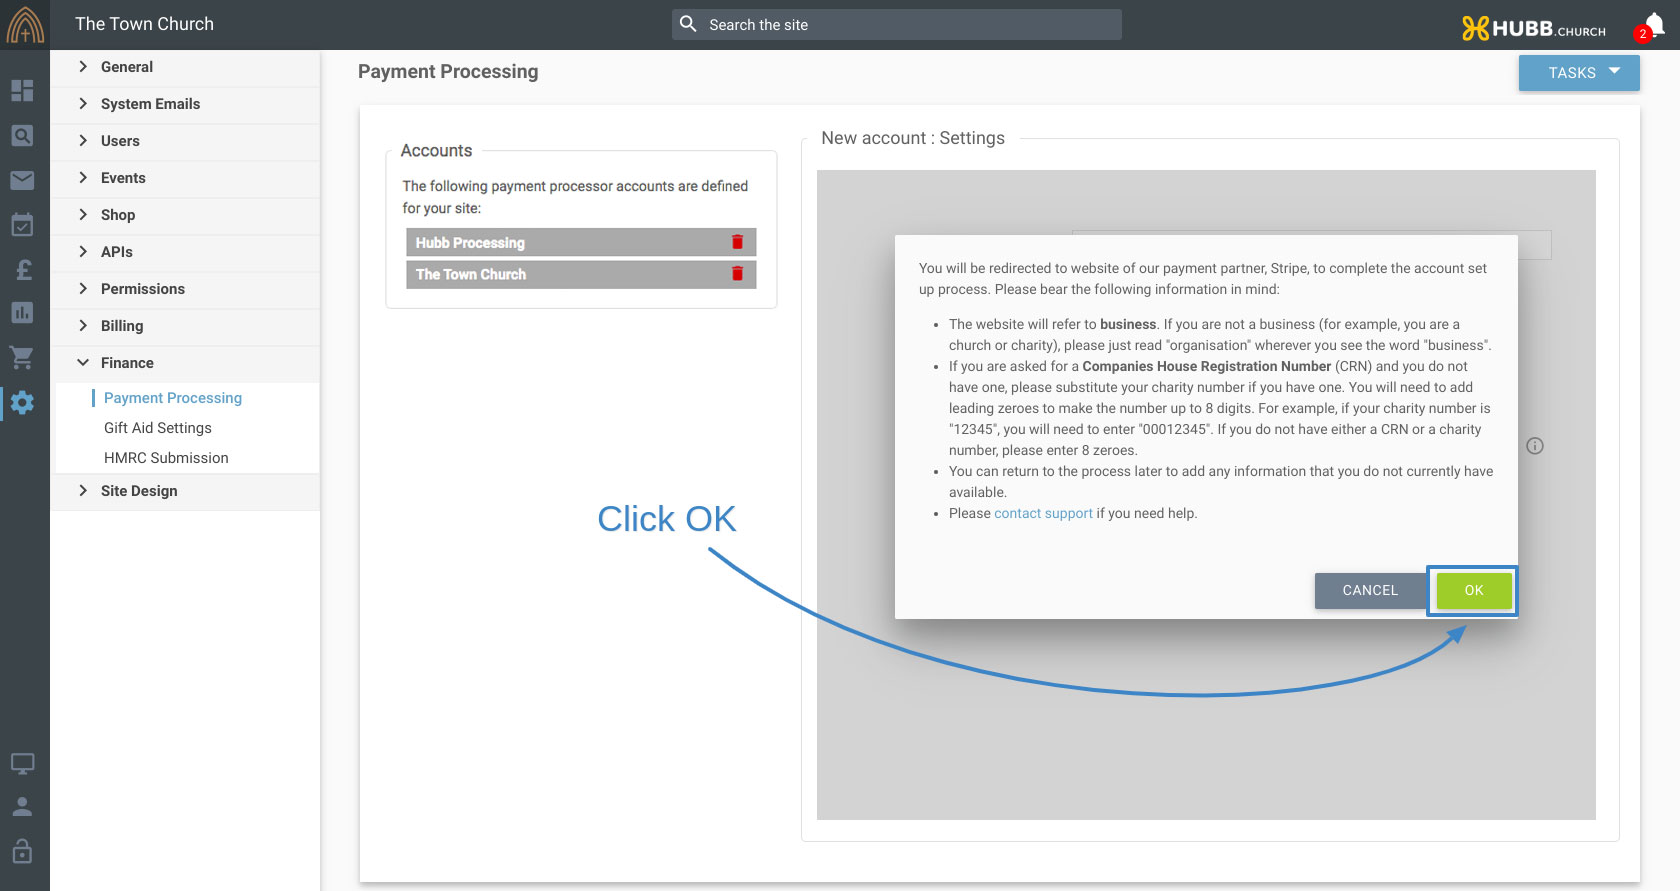
 4. Read instructions
-
Please read through the instructions carefully as this will help you create your account successfully
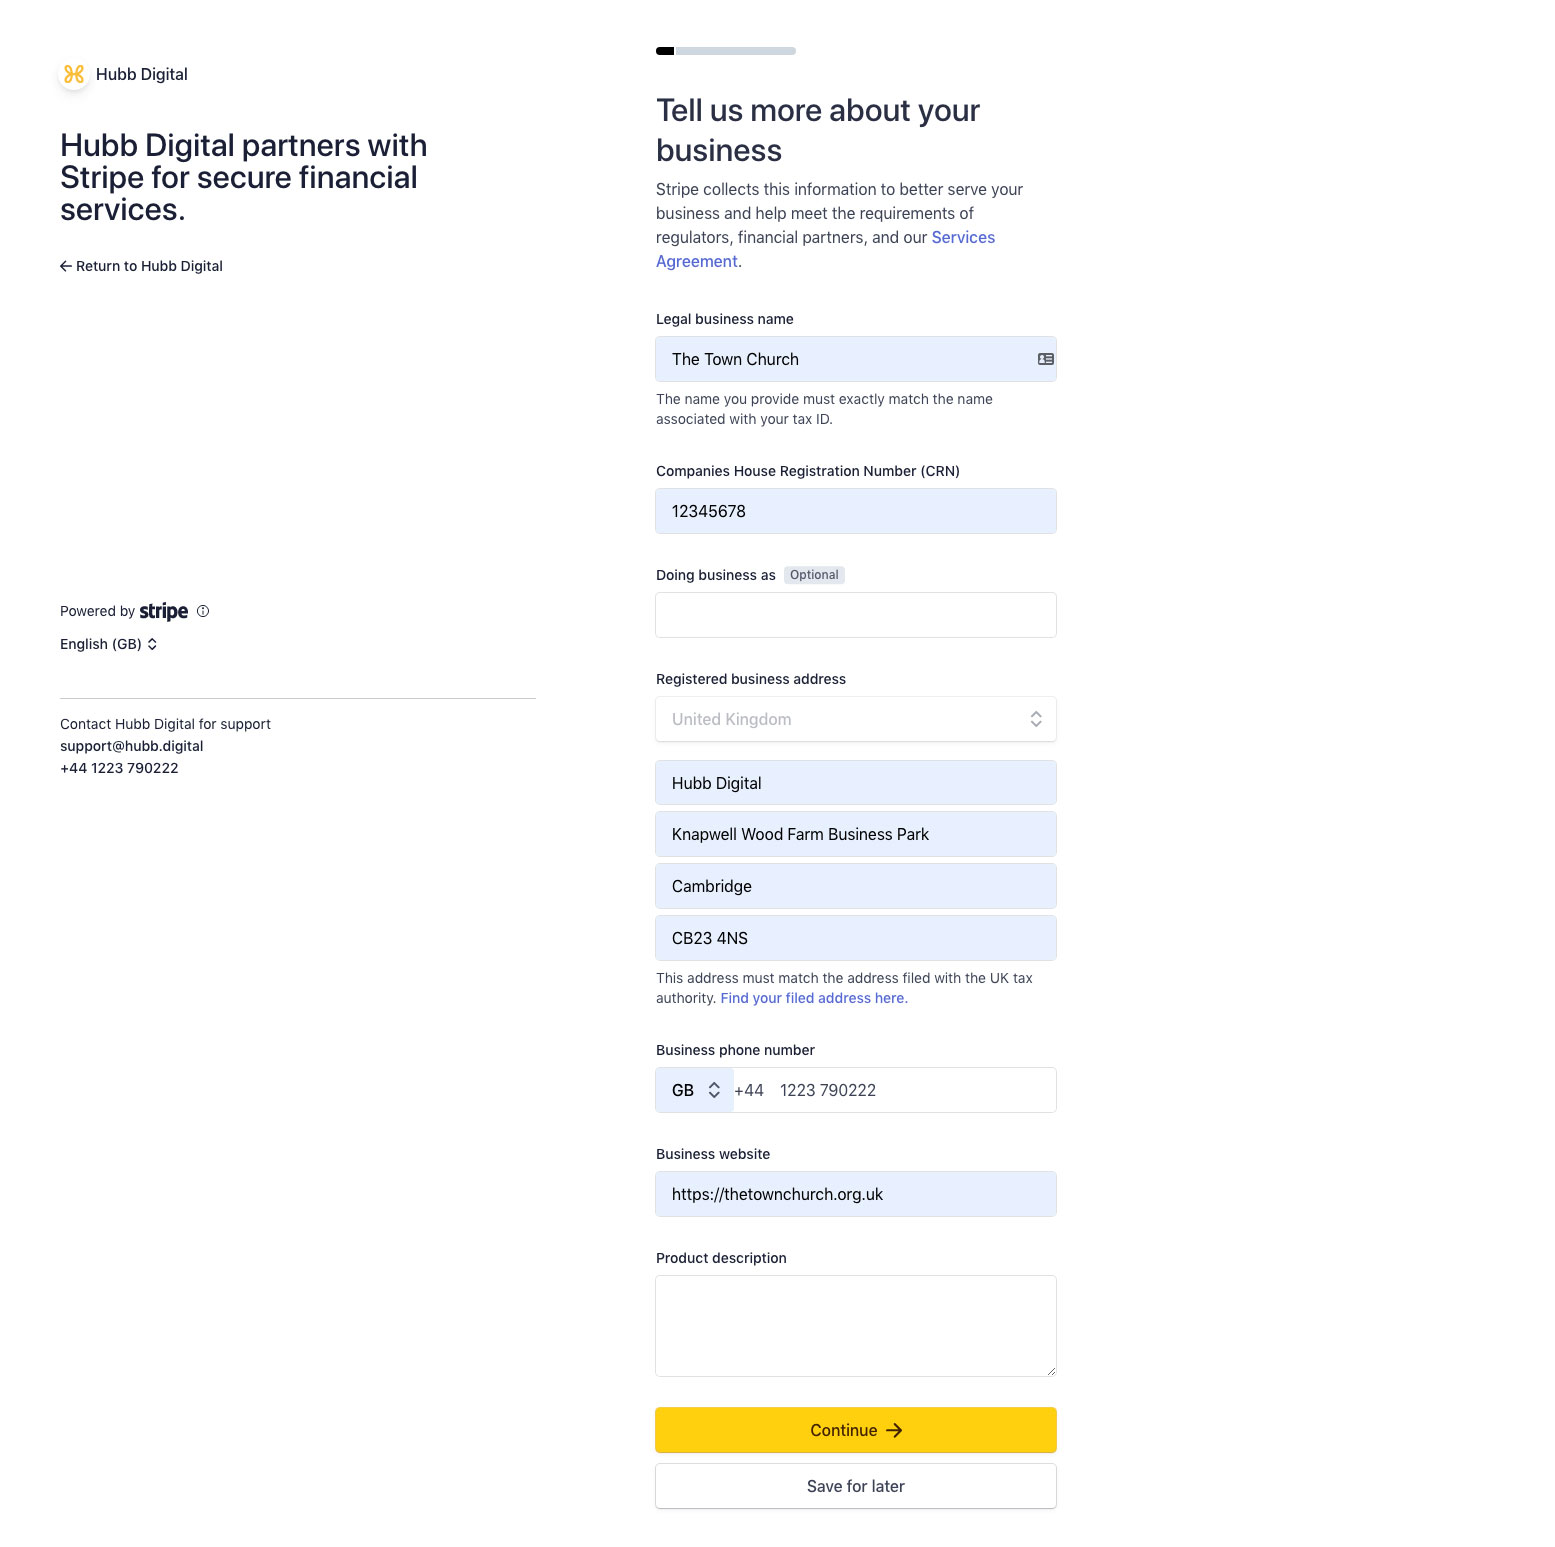
 5. Organisation Details
-
Fill in the details of your organisation
-
Click "Next" to progress to the next page
Please note:
**Charity name and address needs to exactly match charity commission**
The website will refer to business. If you are not a business (for example, you are a church or charity), please just read "organisation" wherever you see the word "business".
If you are asked for a Companies House Registration Number (CRN) and you do not have one, please substitute your charity number if you have one. You will need to add leading zeroes to make the number up to 8 digits. For example, if your charity number is "12345", you will need to enter "00012345". If you do not have either a CRN or a charity number, please enter 8 zeroes. |
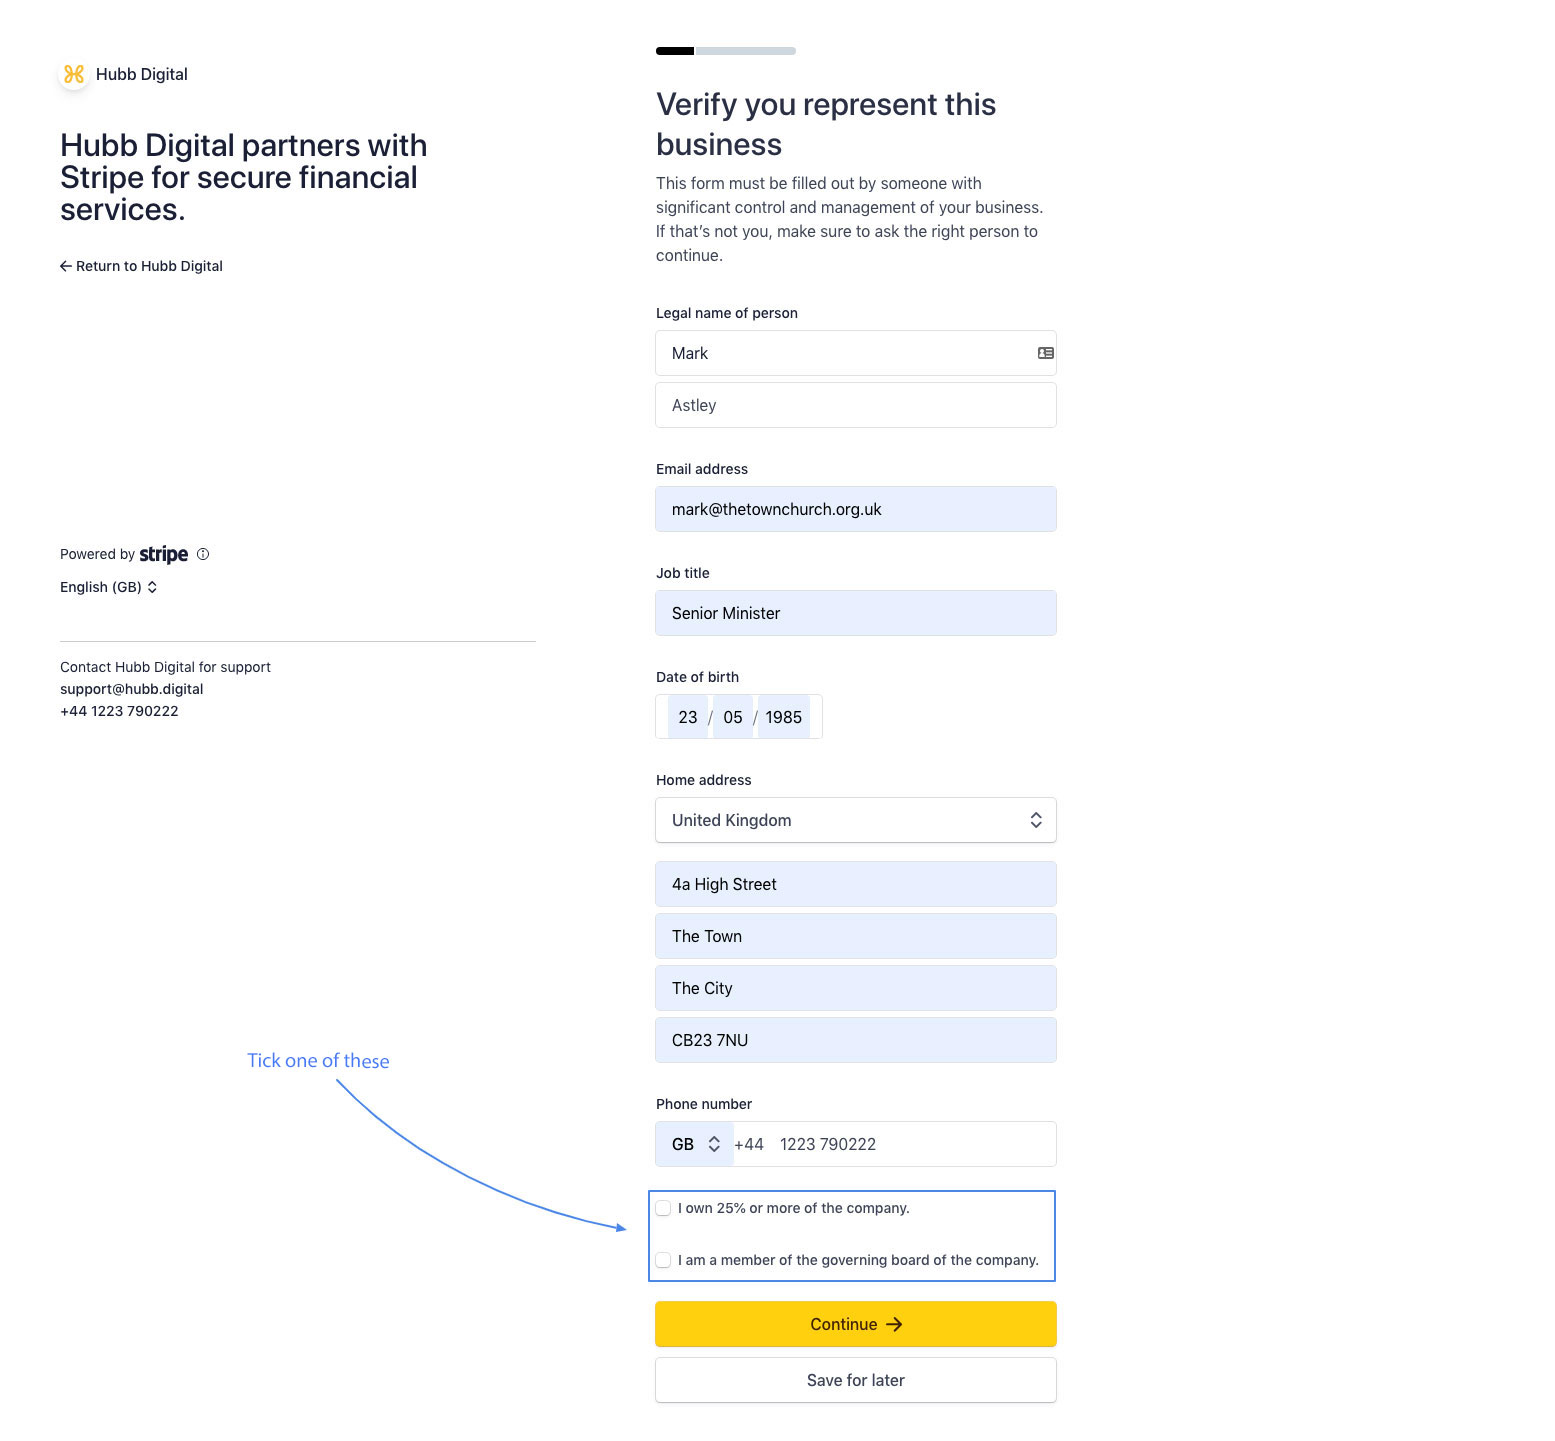
 6. Key account holder
-
Please fill in this section for the person who has a reasonable level of authority to represent the organisation i.e. vicar, treasurer, senior staff member
-
Leave the bottom two tick boxes blank
Please note: The address must match any documentation you provide later in this process
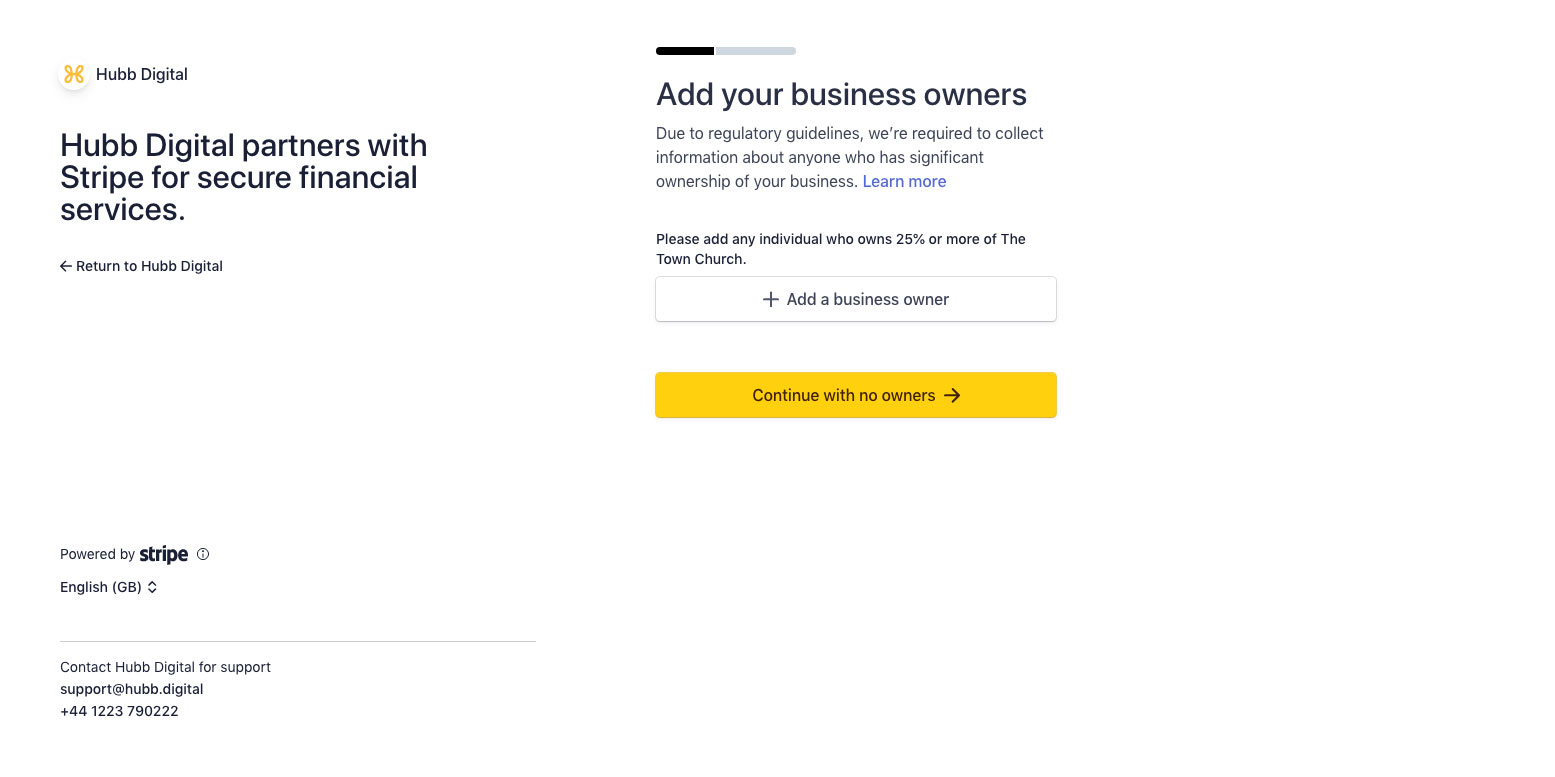
 7. Skip business ownership
-
You may not have a 'business owner' so you can continue without this information, it may be something Stripe will require in the future.
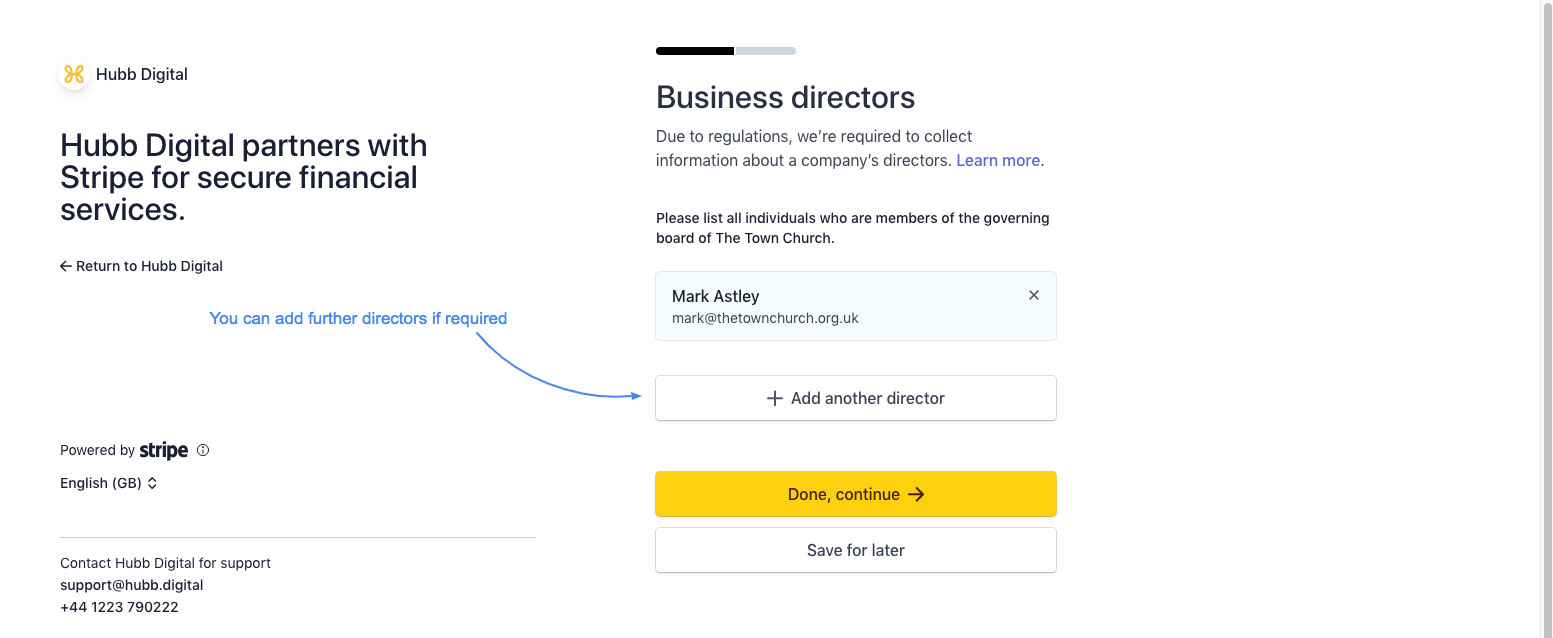
 9. Add business directors
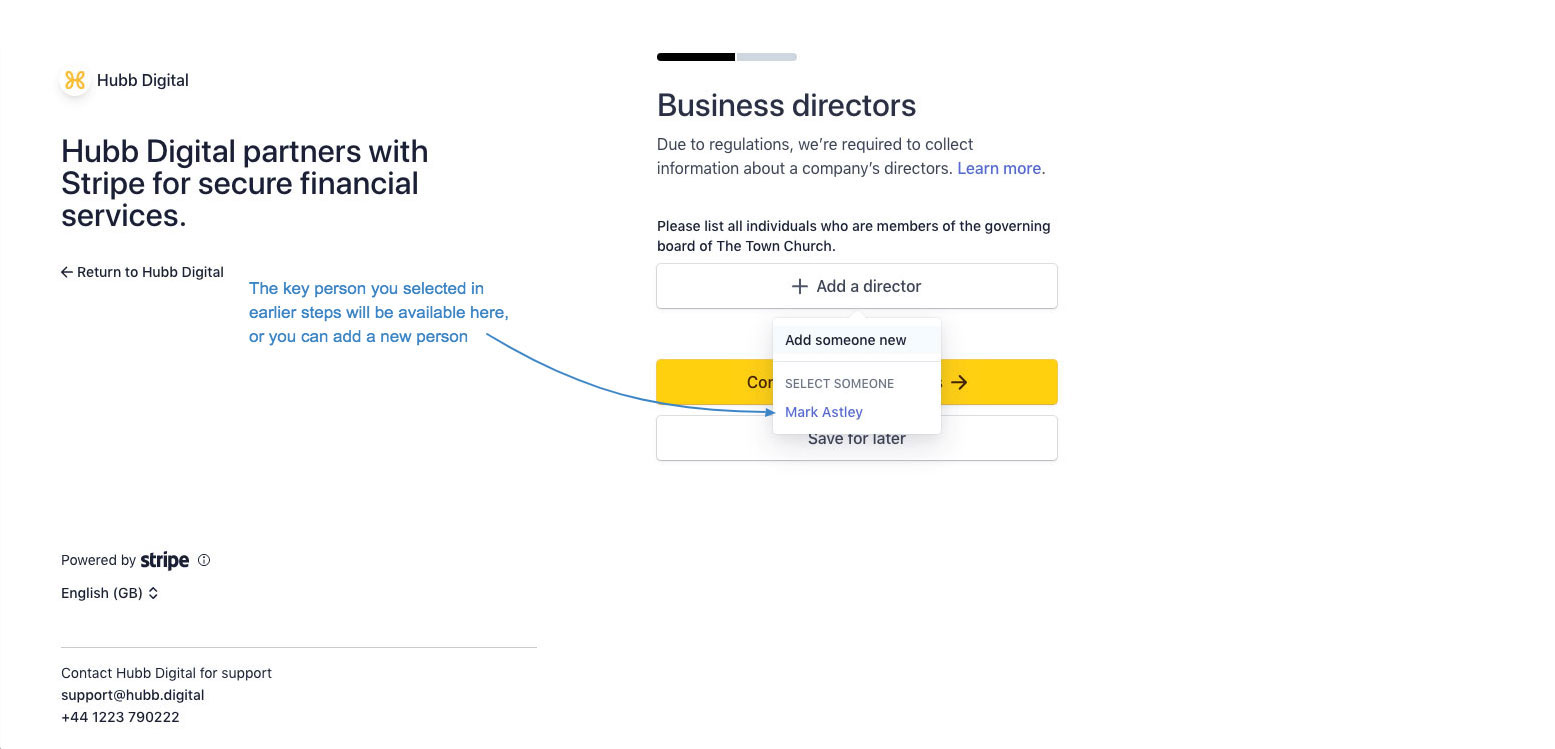 10. Add any further directors if you wish
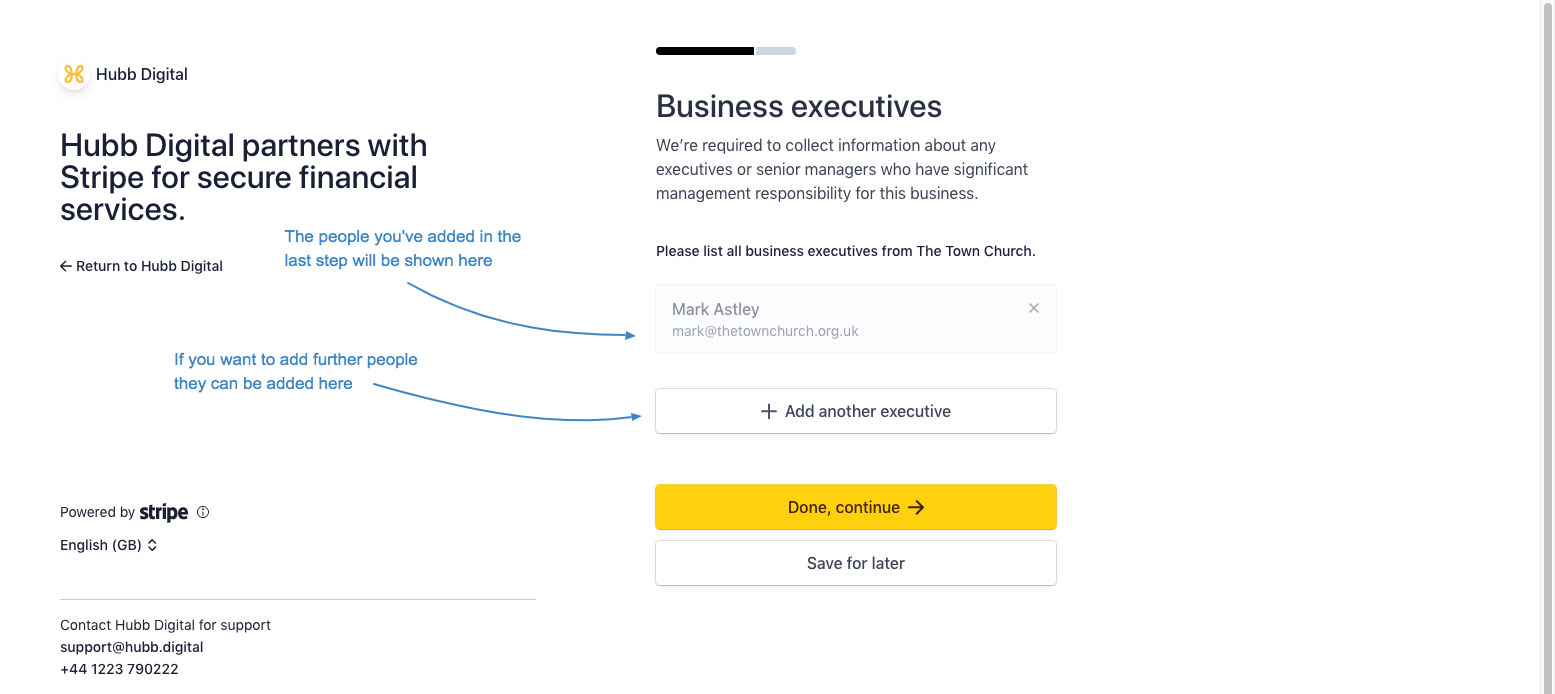
 11. Add Business Executives
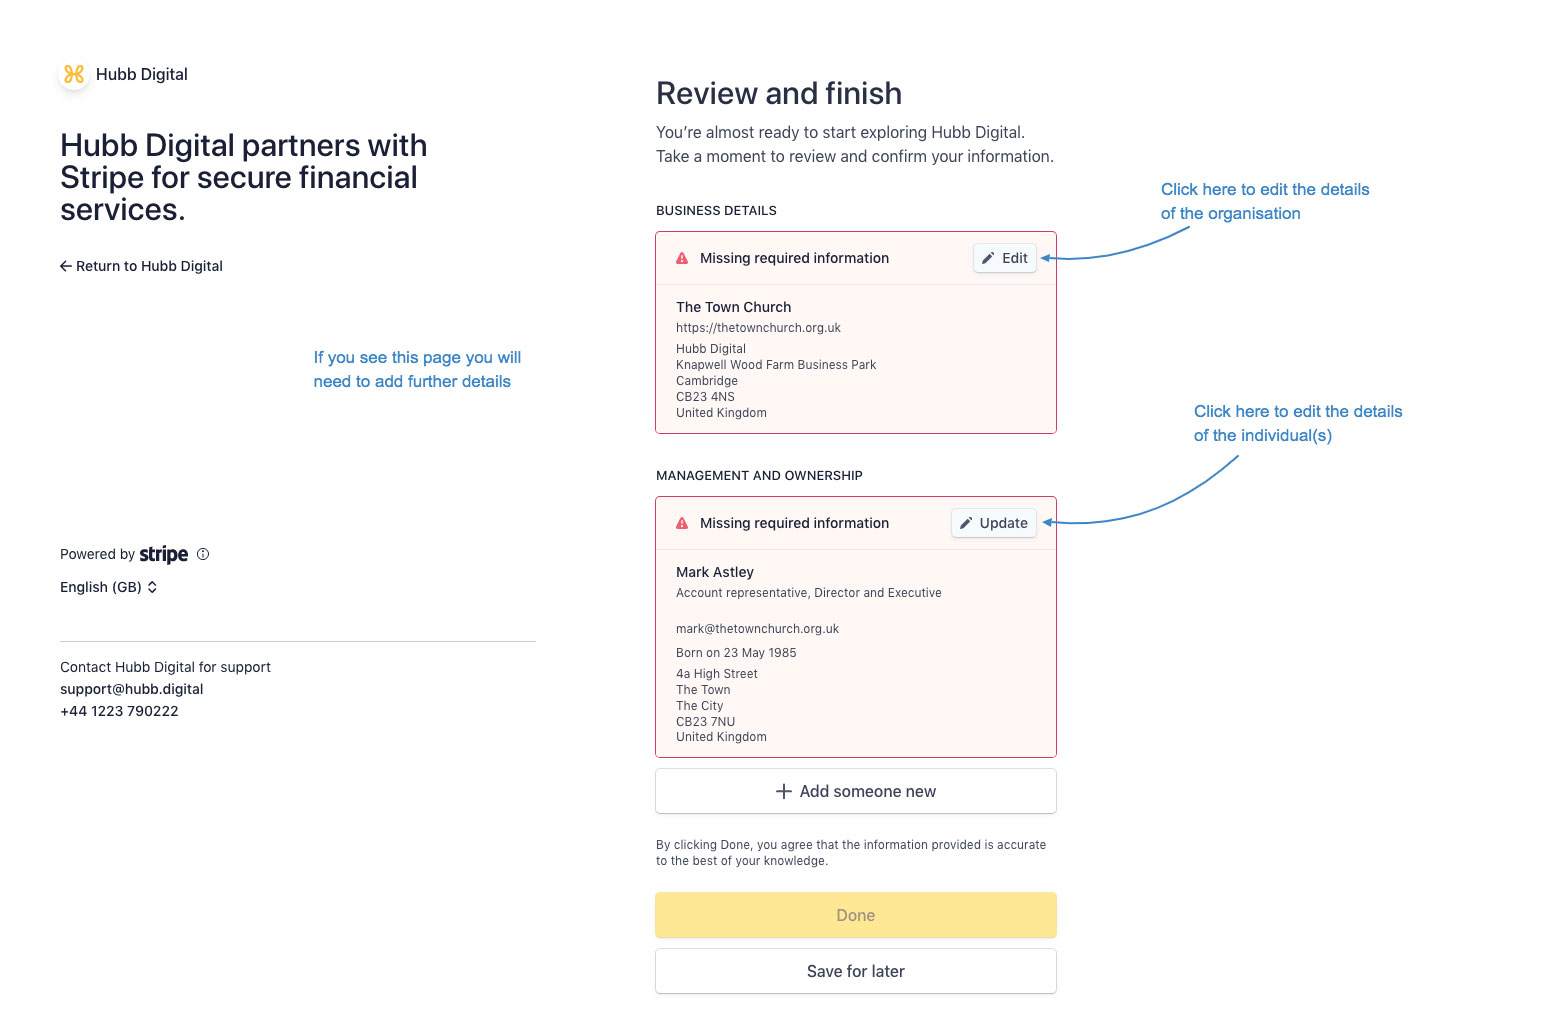
 12. More details required (this step isn't always required, Stripe can sometimes verify with the information already provided)
-
You may now be asked to submit further details for the church and the key contact (this is not always required)
 13. Get your charity document to use as a verification document
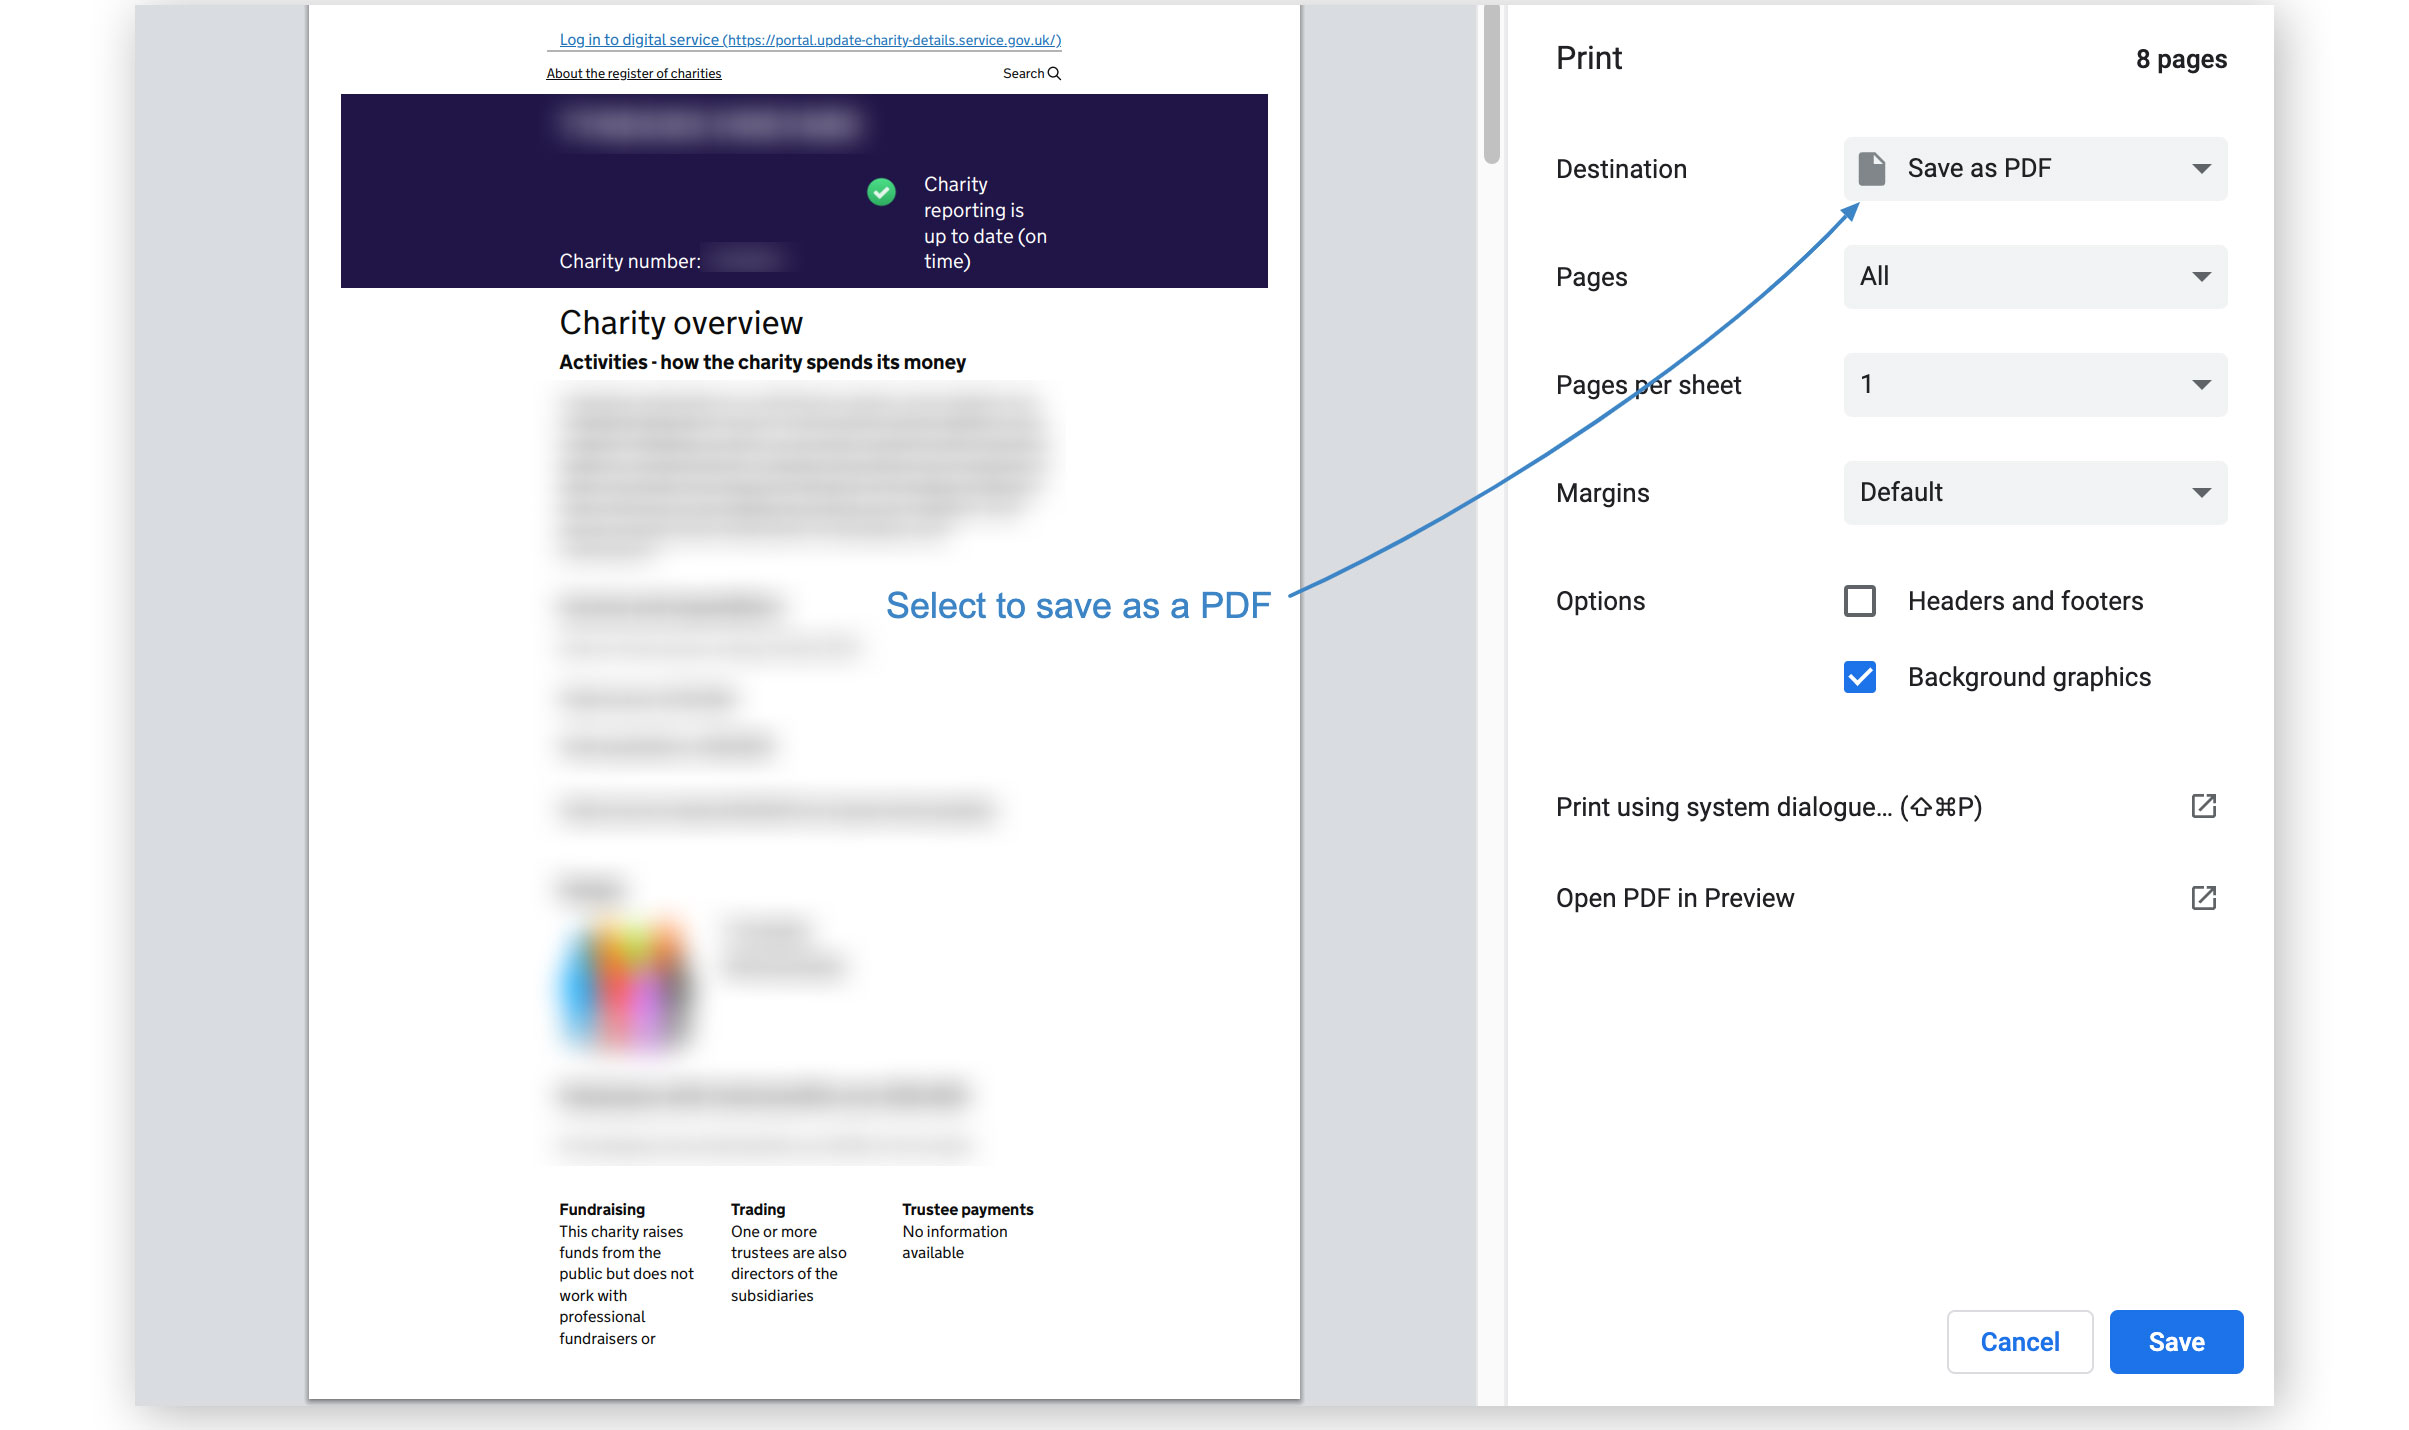
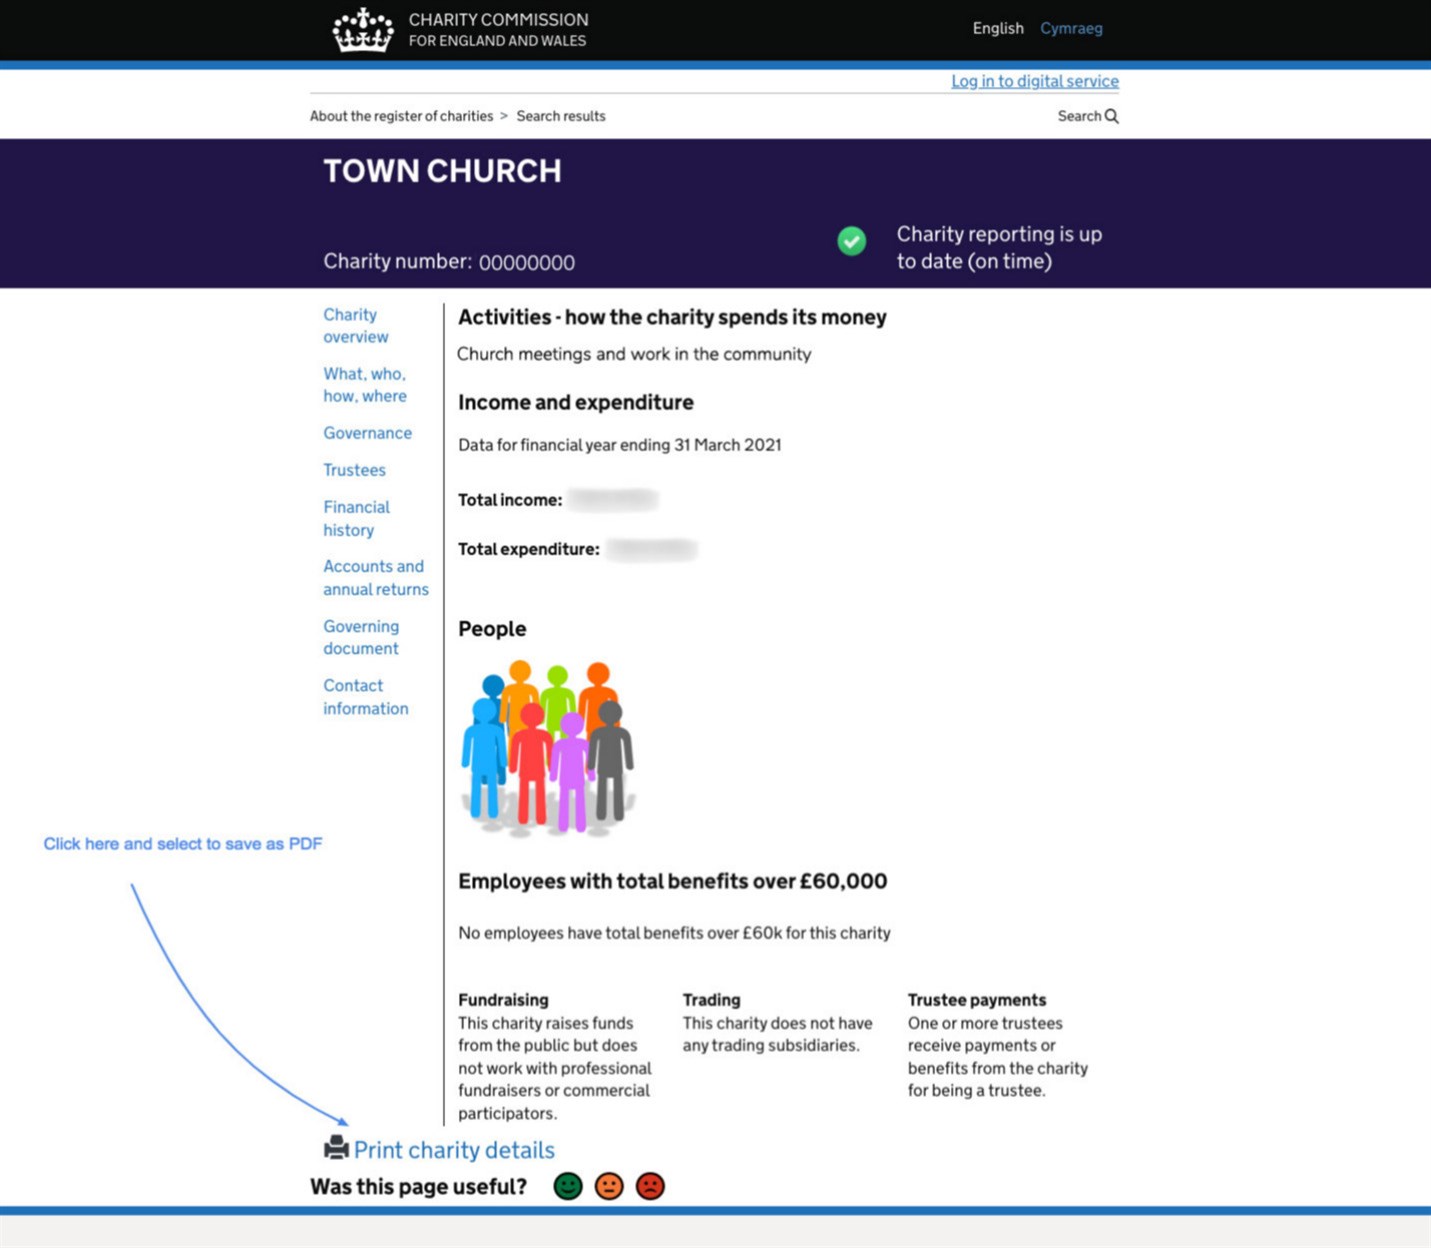 14. Save your document as a PDF
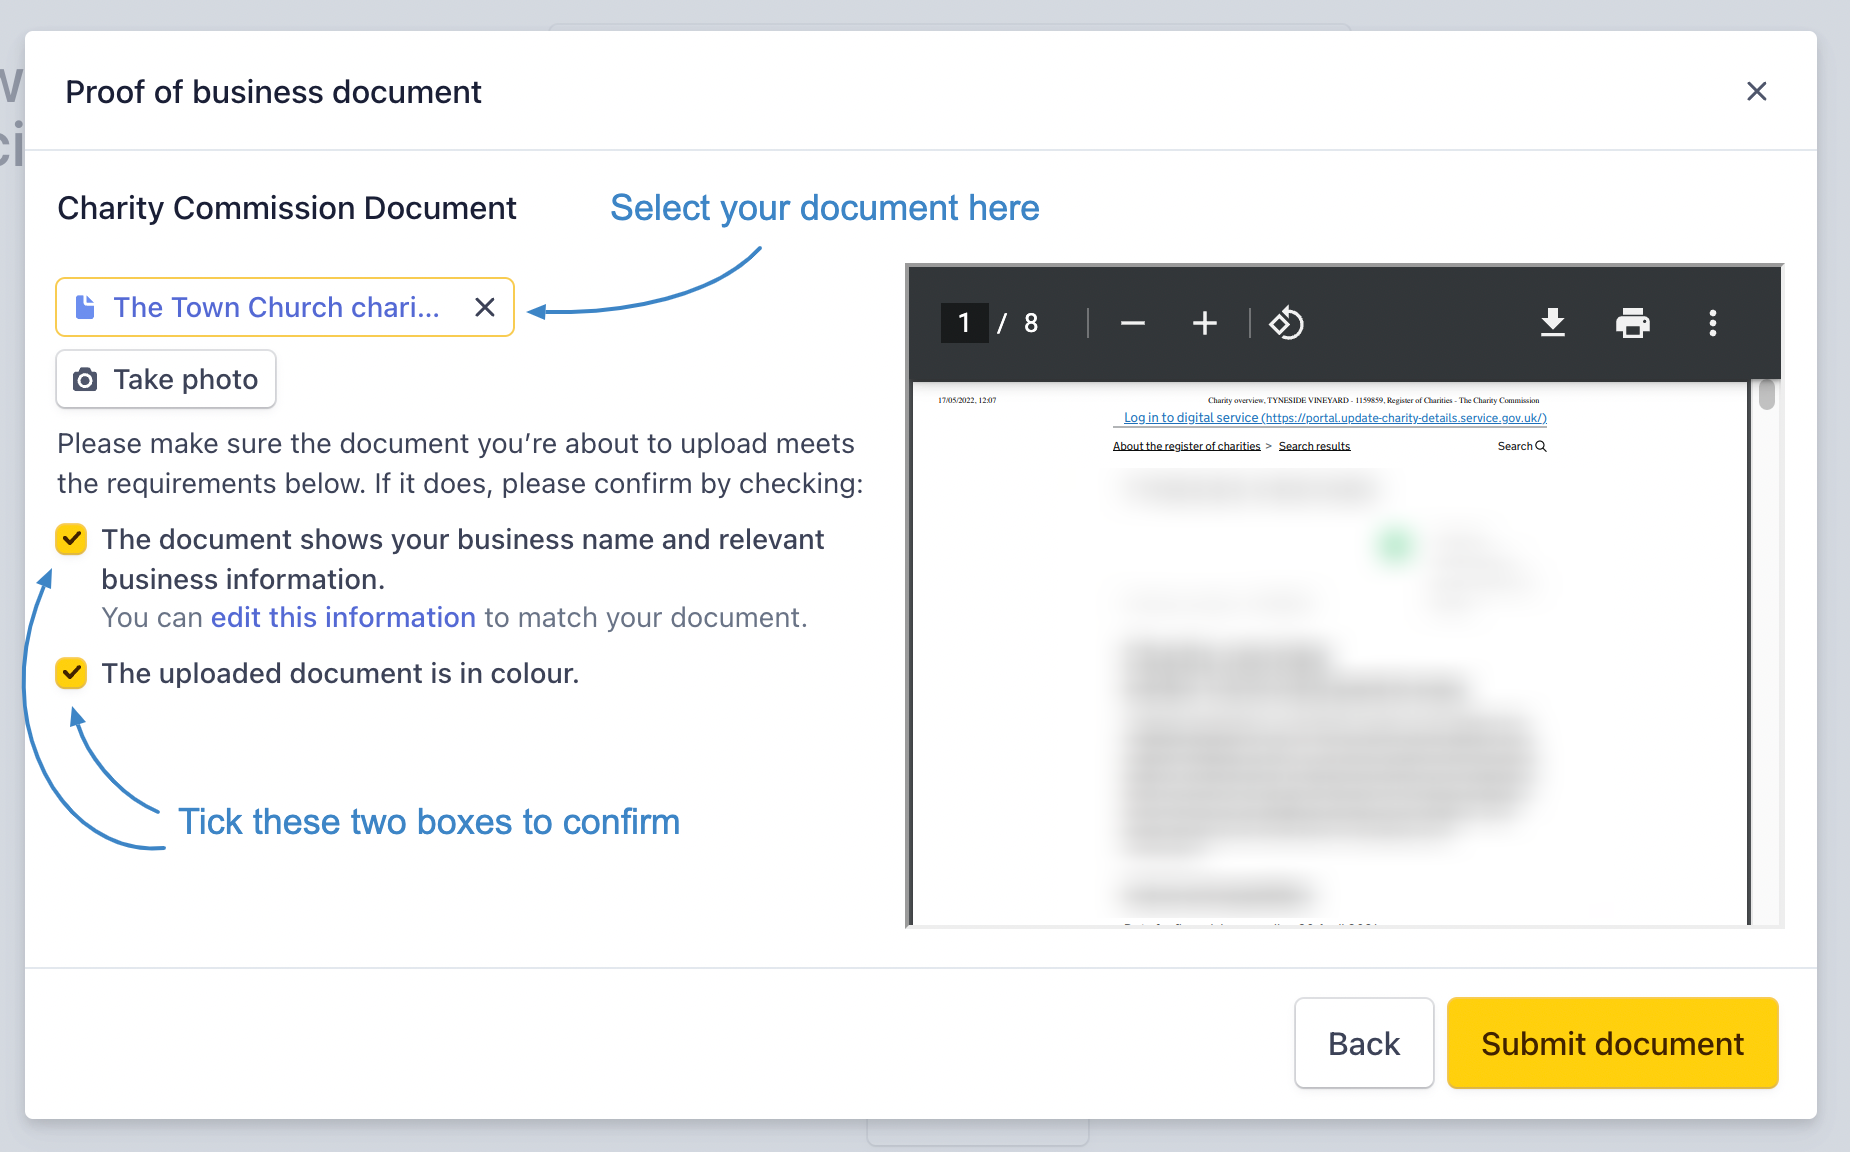
15. Upload your document
-
Back in the setup page, click on "Upload document" and upload the file you just downloaded to your device.
-
Save your upload
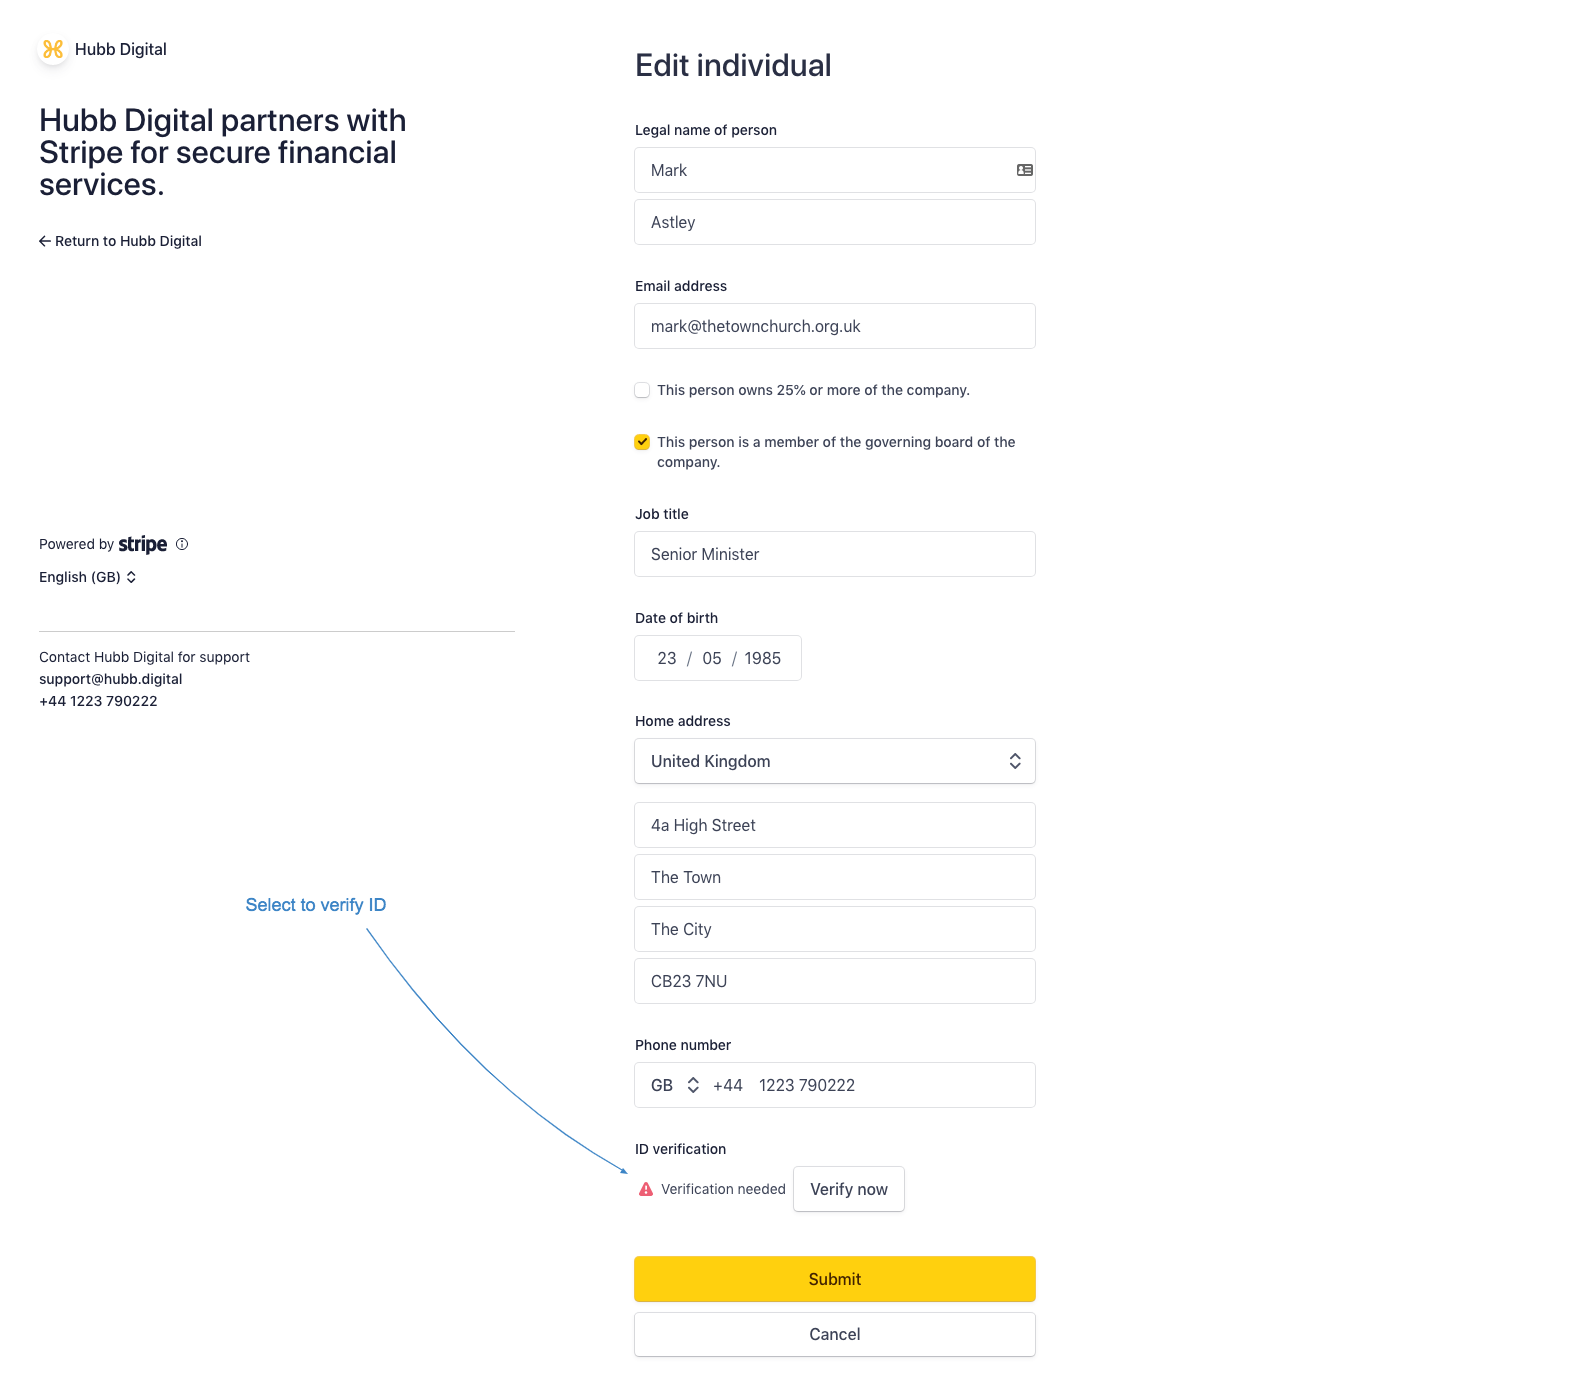
 16. Update your key contact's information
-
Click "Update" for your key contact, check all the details are correct and under ID Verification click on "Verify now".
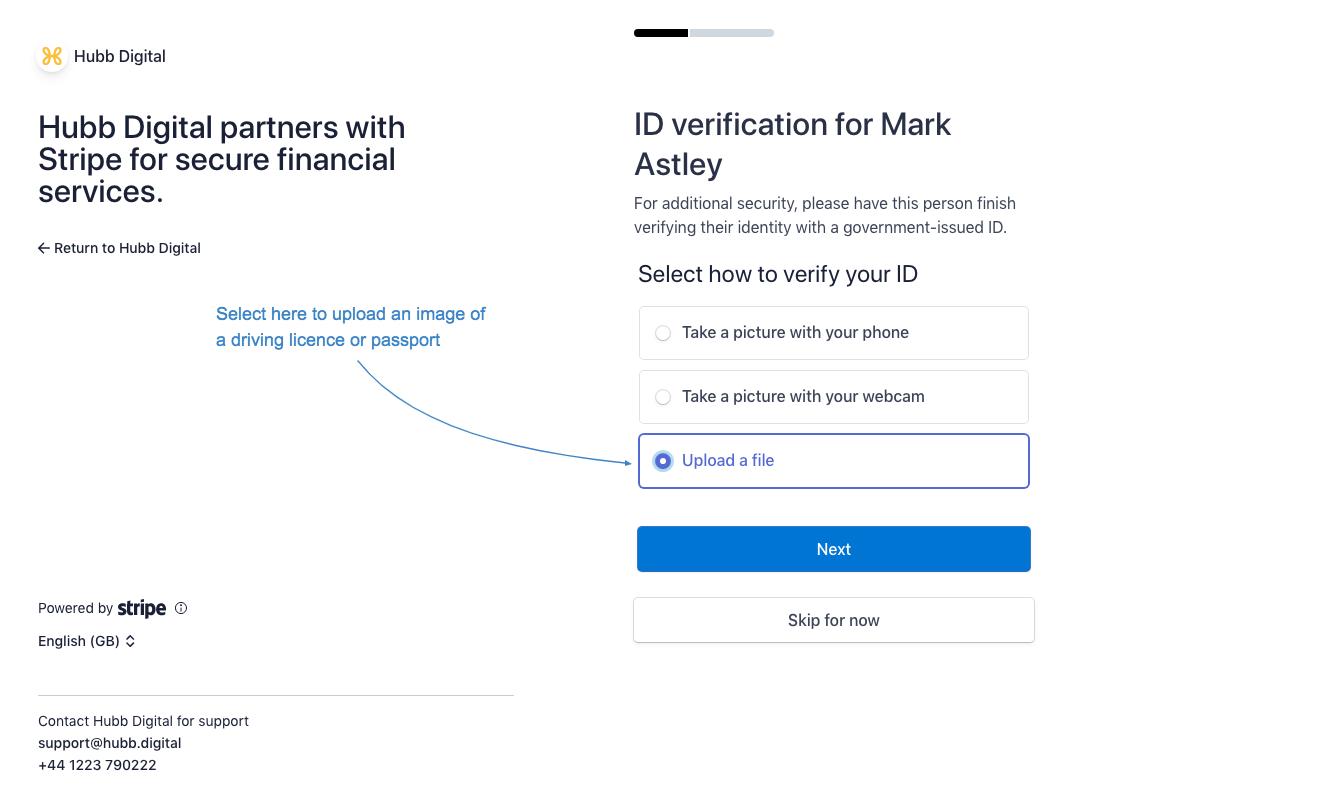
 17. Proceed through the steps selecting to upload a file (this will normally be a photo of your passport or driving licence)
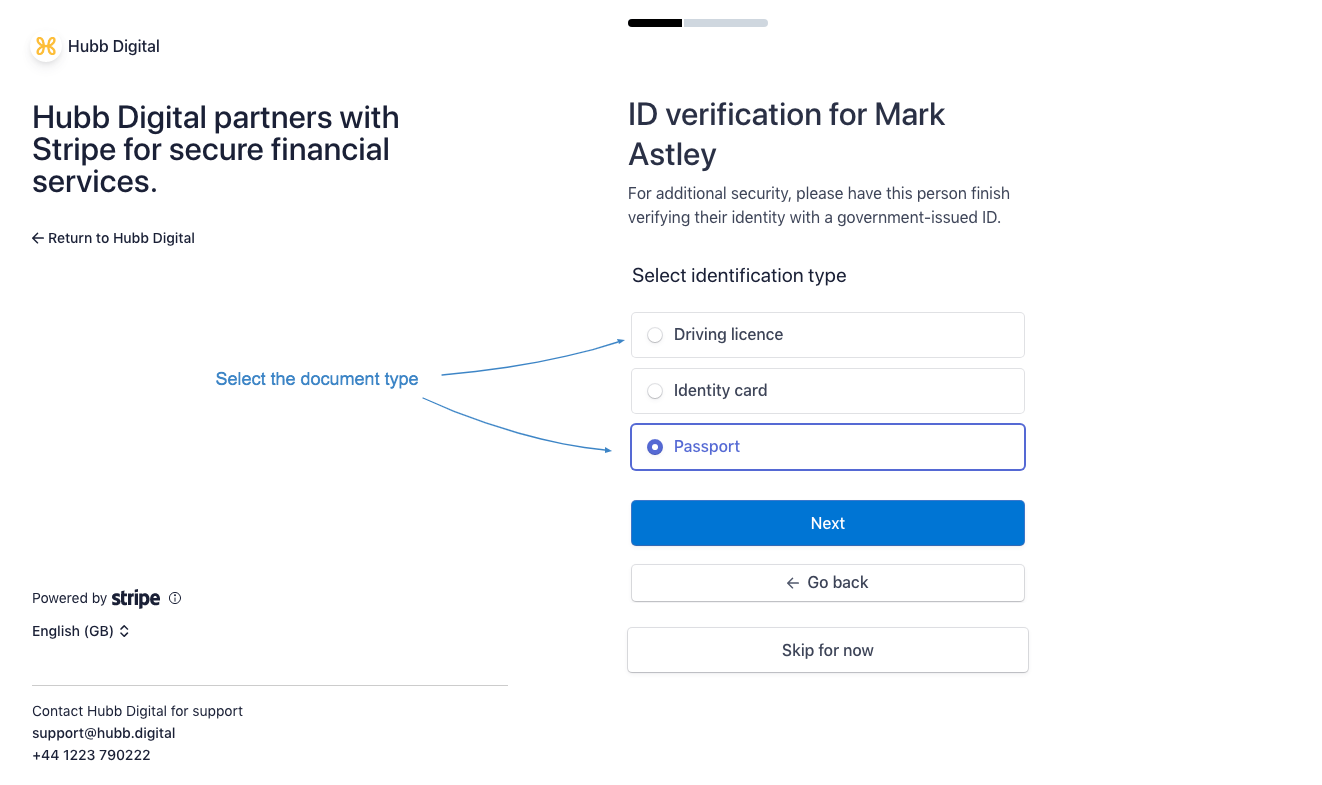
 18. Choose ID
-
Pick the ID type you will be uploading
 19. Select the file
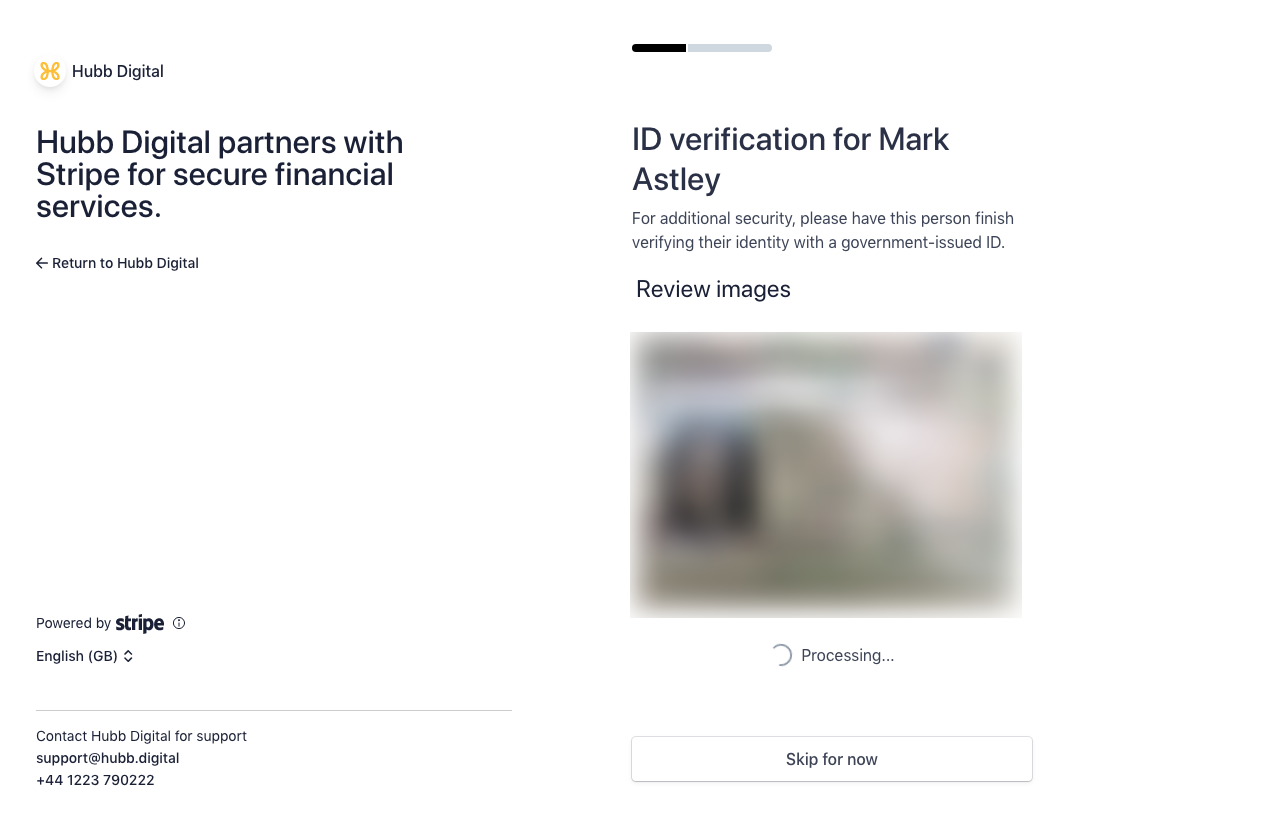
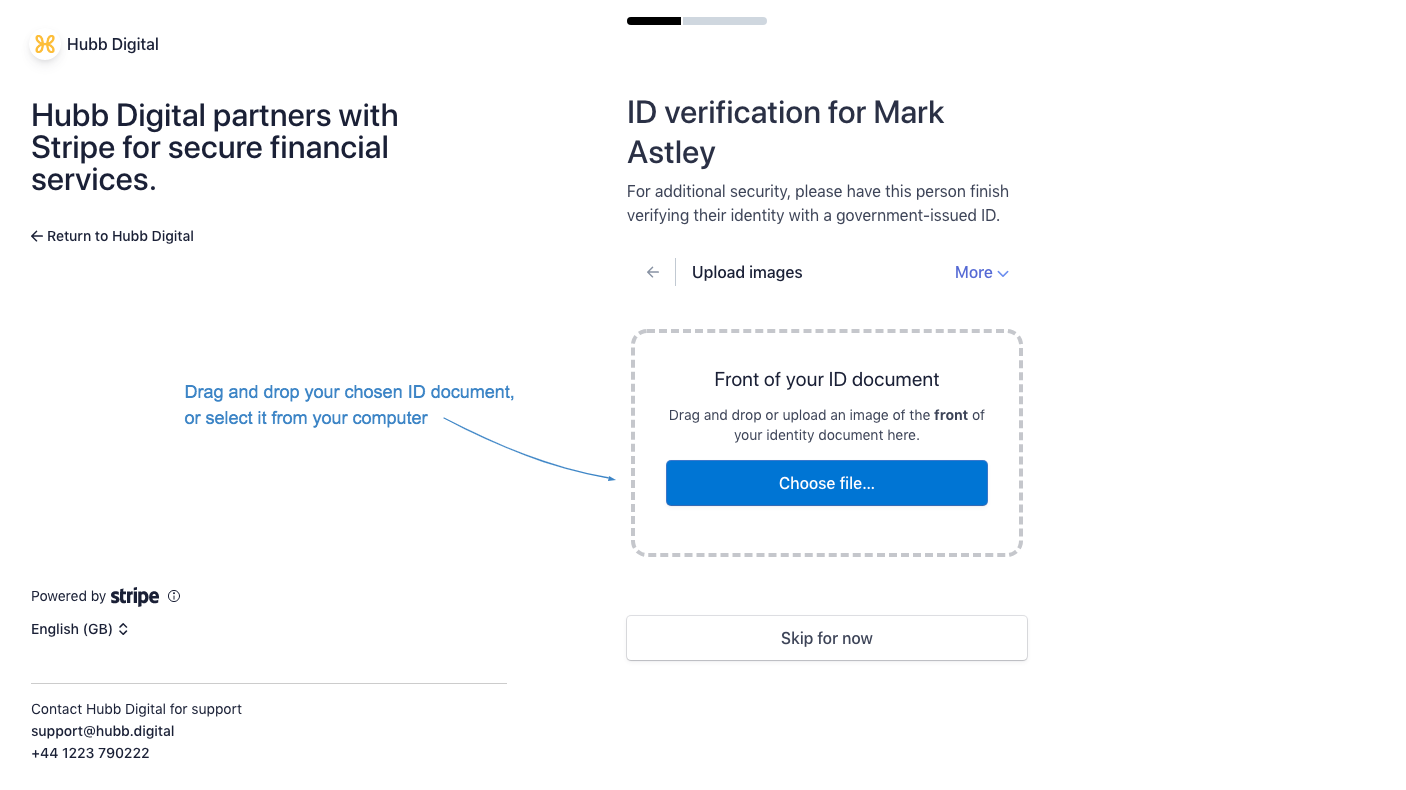 20. Upload the file
?
 21. You may also need to verify the address of this individual, this process should be similar to above, but you will need a document that has the address of the individual, so a utility bill or bank statement.
|
Please Note: The address on your document must match EXACTLY the details given for your key contact earlier in the process, otherwise the verification will fail. |
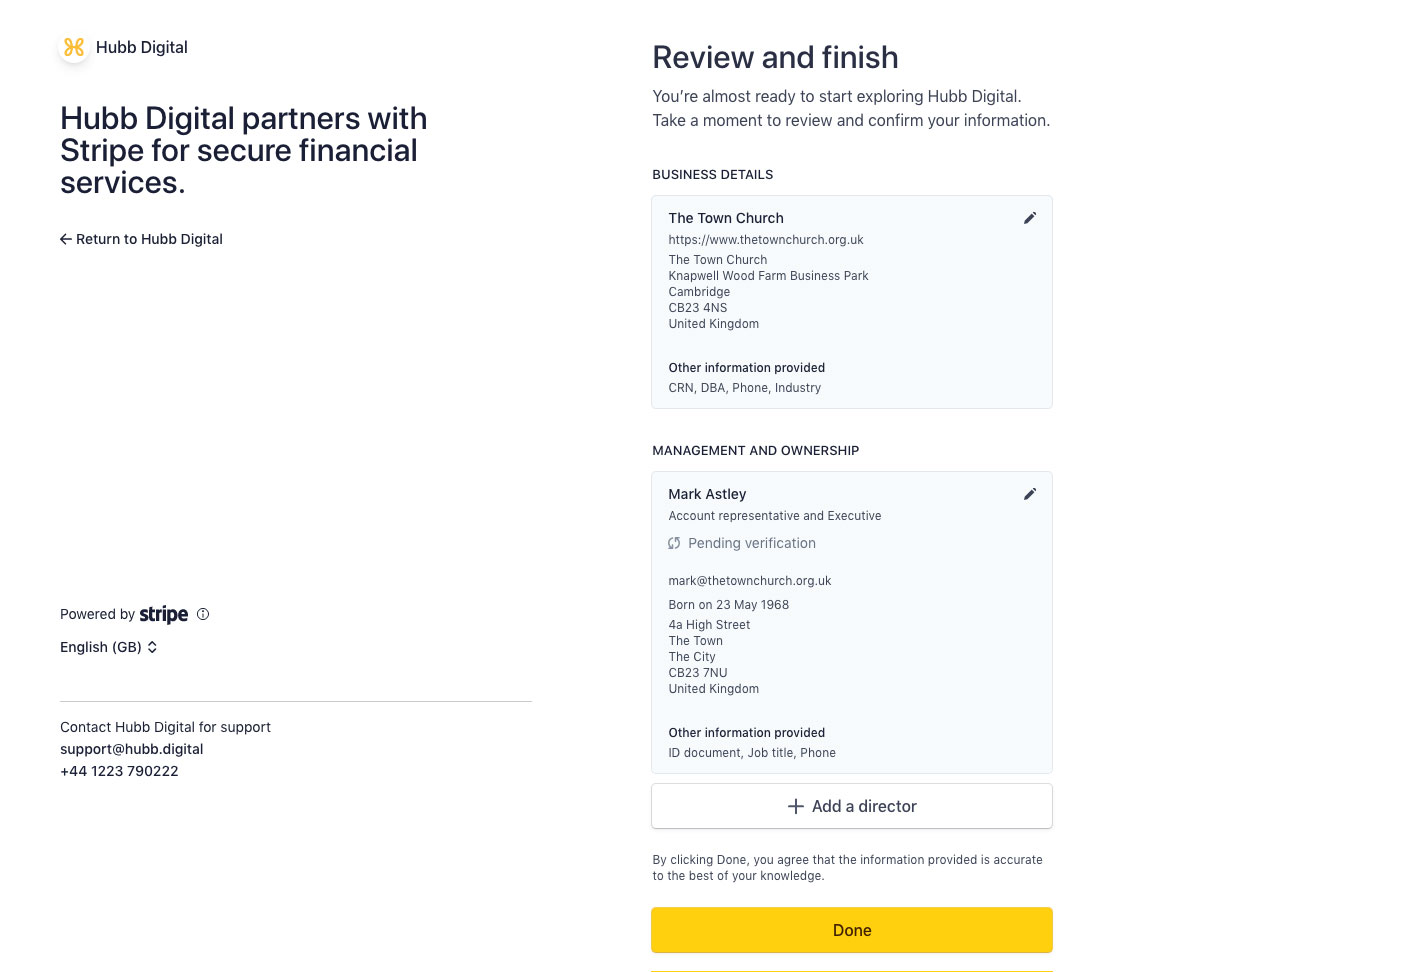
22. Review the information and click on 'Done'
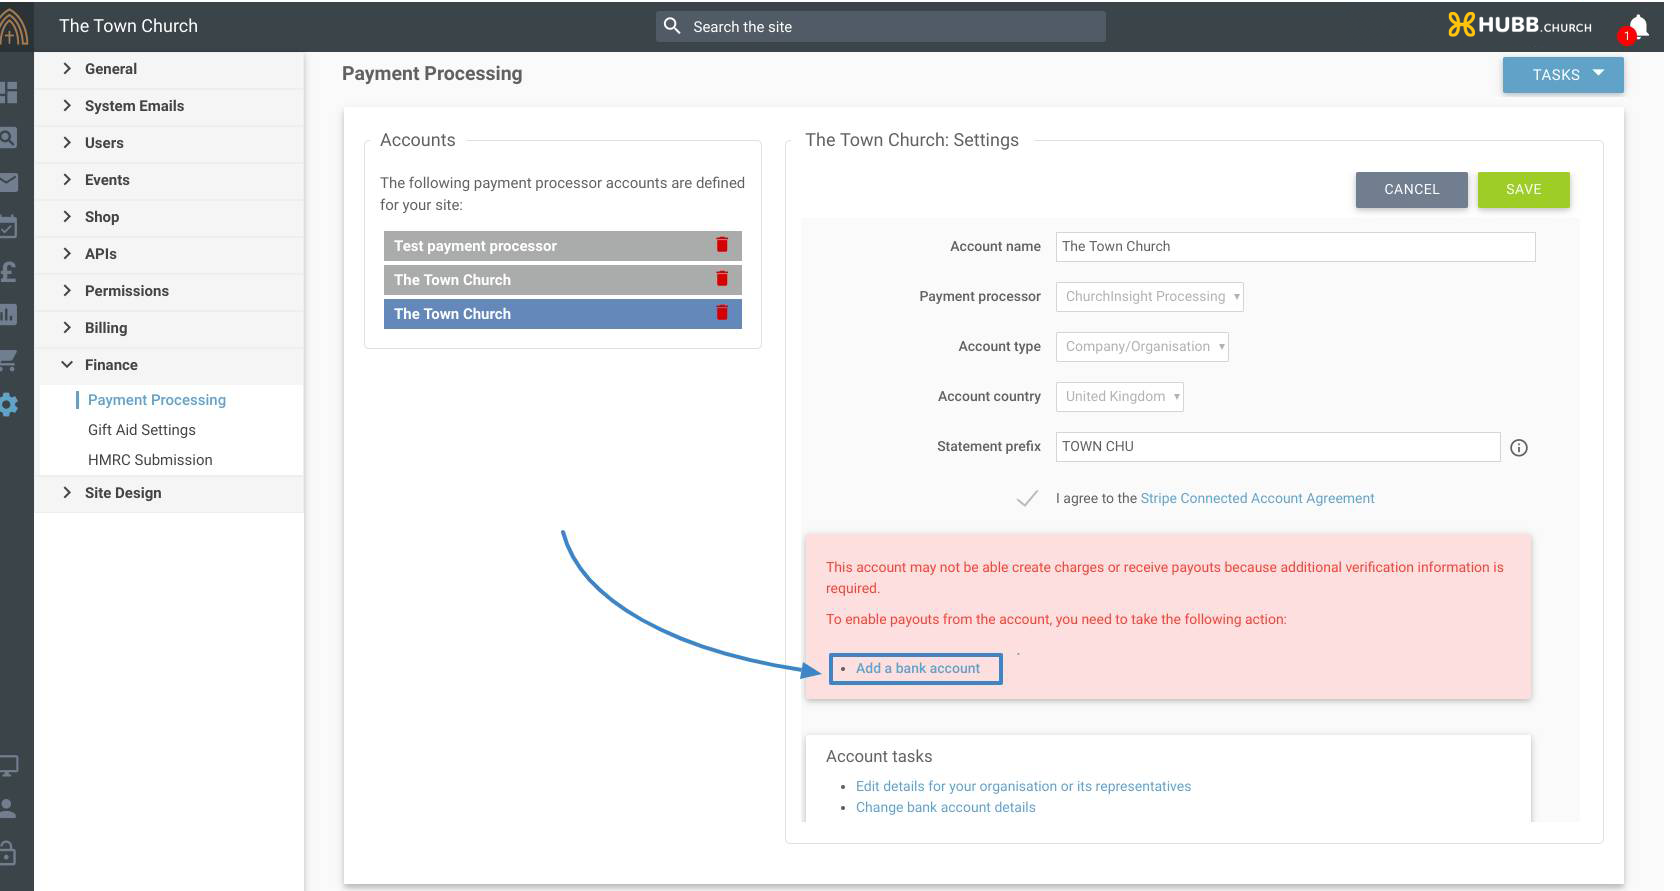
23. Add bank account
You will now be presented with some details of your processing account. You will now need to add the bank account that you want your funds to be sent to.
-
Click on "Add a bank account"
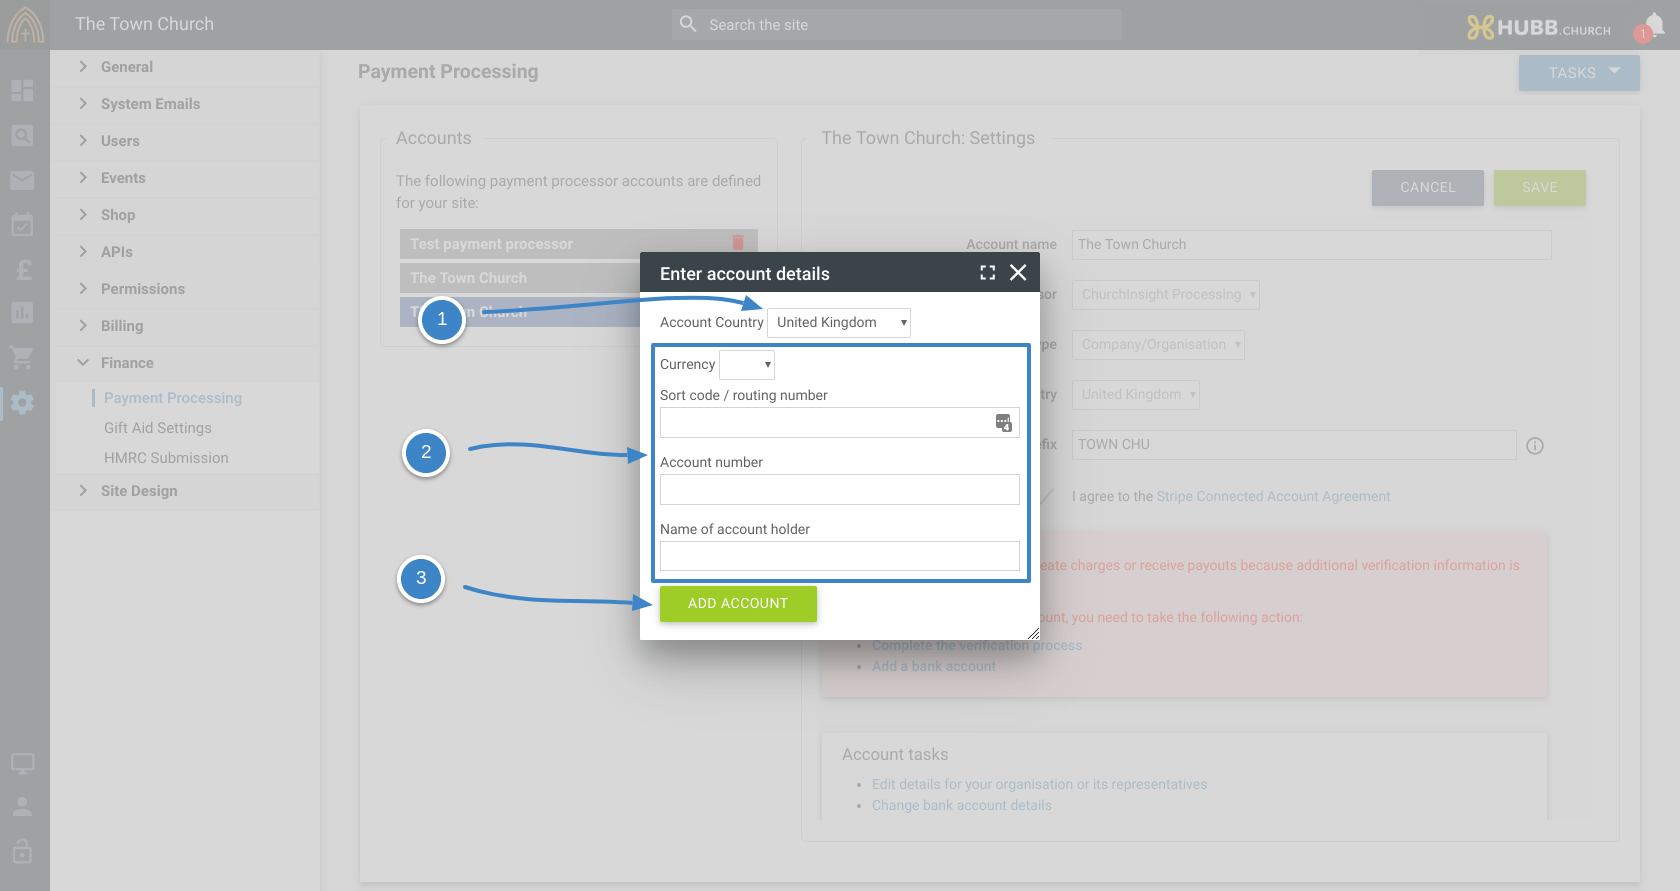
 24. Complete bank account details
-
Pick your bank's country from the dropdown
-
Fill in currency, sort code, account number, name of account
-
Click "Add account"
 25. Check verification
The account will now take time to be verified. Please check back in a day and check to see if it is verified. You can still progress the next steps to setup your donation page.
If there are items that need your attention you will see a light red box with links to click on and update the documents. Once you have completed those steps, check back in a day again.
N.B. If your payment page is already created you will need to go to the 'Advanced Options > Payment Schemes' and select your new payment processor from the dropdown.
Setting up your payment page
Follow the steps in this video to create your donation system. We call this a "Payment Page".
Play video on full screen mode
Sorry, your browser is unable to play this type of file.
You can still
download it
Add the payment module to your page
Follow the steps in this last video to embed the donation system into your web page.
Play video on full screen mode
Sorry, your browser is unable to play this type of file.
You can still
download it
Once you have completed the set up please test the payment page to check the process is working correctly.
For more information, or if you would like the module styled to your logo/brand colours please email
support@hubb.digital and we will be happy to answer your questions and help you.