Audio & Video recordings
This guide provides an introduction to preparing your multimedia recordings for distribution over the internet, uploading those files to your web site, and linking them to other services and content.
Preparing your files 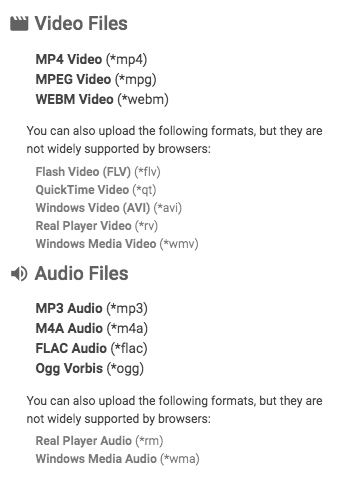
Before you upload your multimedia files to the Hubb media servers you should first ensure that the material is in a format which is accessible to your audience. A list of acceptable formats is on the right (you can click on the image to enlarge it). Both audio and video files are usually compressed – a process which involves dramatically reducing the amount of data making up the file in order to speed up the download time when it is accessed by a visitor to your web site.
Compression is always, to some degree, a compromise. In order to reduce the size of the file, data has to be thrown away – the compression tools you use aim to minimise the impact of this “slimming down” by throwing away the less noticeable aspects of the audio/video and retain the “essence” of how the recording should look or sound.
Embedded metadata
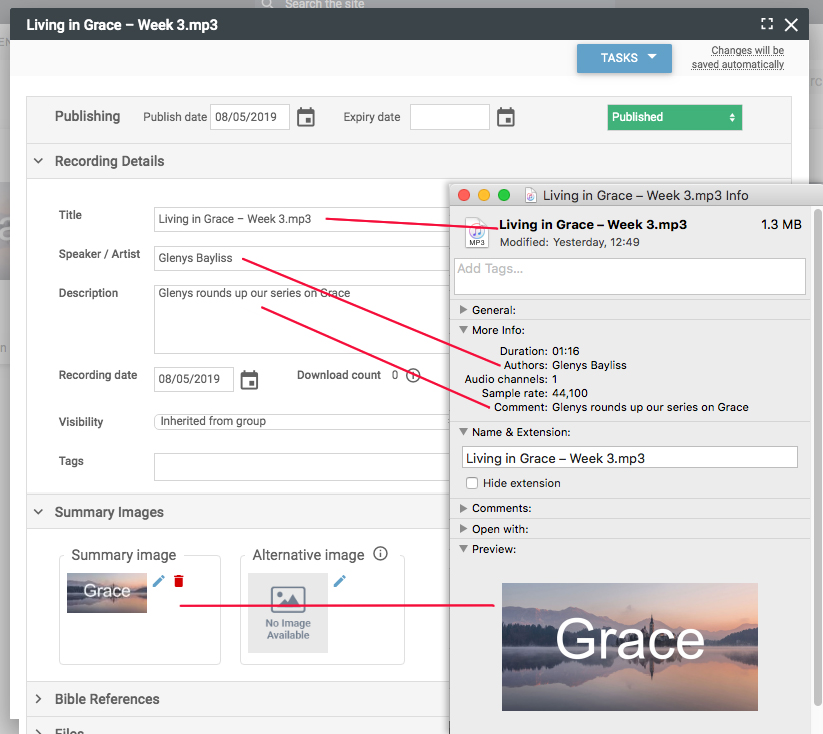
If you have metadata embedded in your audio or video files then this will save you time when you come to upload your files as these details will automatically be transferred to the file in the web office. (click the image on the left for a larger view)
Note: Only the title (album) and speaker/artist fields are mandatory.
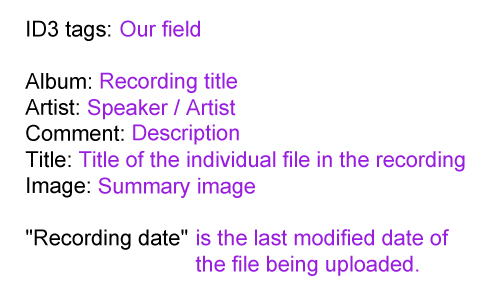
The description field is used in the media search however so this field will ideally contain a clear description containing the keywords users might search for on the item.
As with articles and images you can set the visibility of the recording according to whether people are visitors to the site, registered site members or group members.
Creating a Recording
Simply drag and drop your audio or video files, along with any document files you wish to have linked with them to the middle of the page and these will be uploaded. There's a quick video demonstration here...
Sorry, your browser is unable to play this type of file.
You can still
download it
Displaying media on your web site

To publish the recording so it shows on your Audio/Video page just click on the orange 'draft' button and select 'published'. Once you have have done this the file automatically becomes visible on your web site under the Audio/Video area, and will also be picked up in the site search. You may also wish to display your recording within a particular group of your web site e.g. "Downloads", "Resources" etc, or link to it from a specific article.
Linking to a recording from within an article
You can create a link from within an article to an audio/video recording. For instructions on how to create a link from within an article see the
How do I create a link? article. When selecting the content you wish to link to you'll need to select the 'Audio or Video recording' option. This option will display the media file in a media window.
Media list module
To display a list of uploaded Audio/Video files within a specific area, or on your homepage, you can add the media list module to an article or template. This module can automatically list all the audio/video recordings published within a particular group or media folder.
Adding sermon notes to audio/video recordings
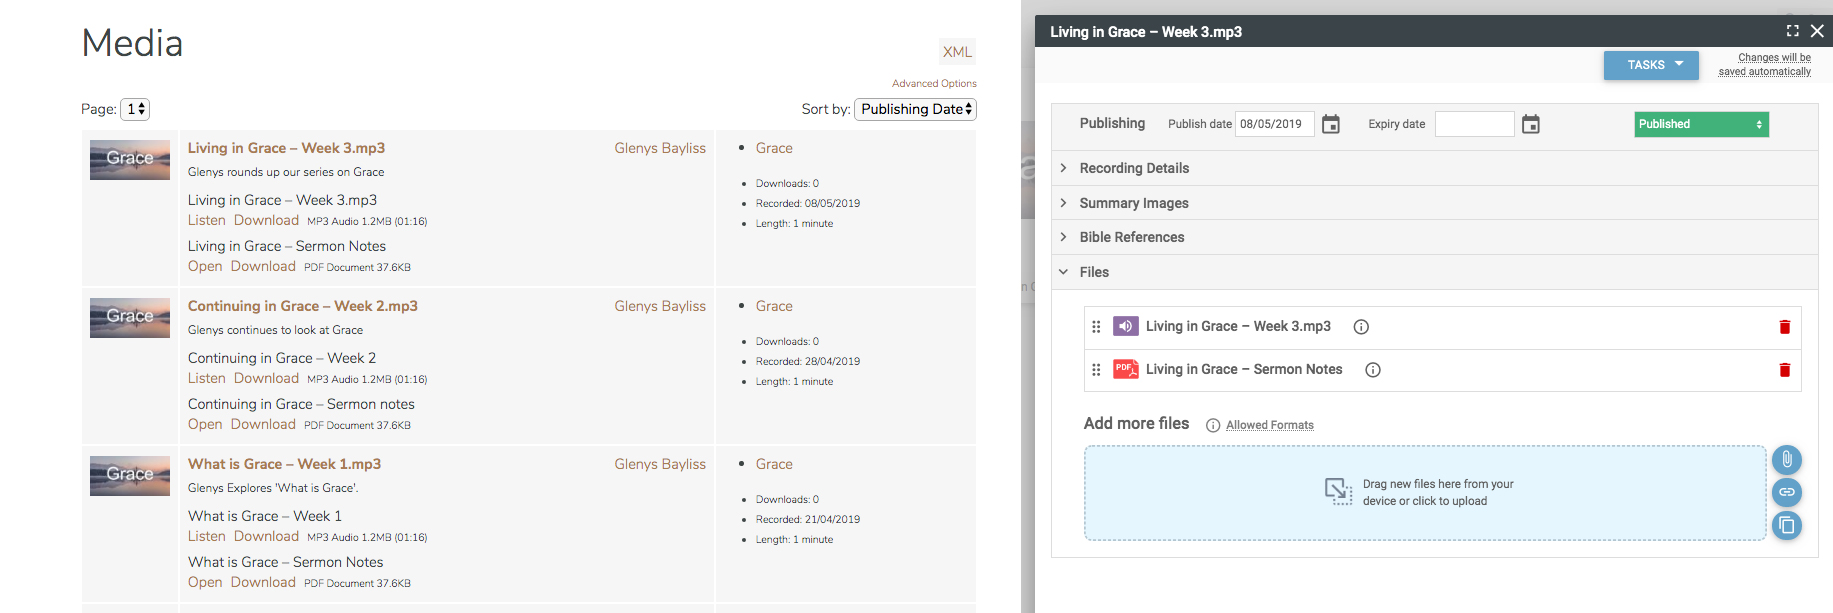
To add document files that you want to be associated with a recording simply drag the file into the recording. This can be done when initially uploading the audio file, or by dragging the file into the files section of an existing recording,
Embedding Video
Video can be embedded within an article or layout using the Media Player component. Add the module to the page and select the video file you wish to play. The video will automatically be set to 100% width of the available area.
YouTube, Vimeo and links in the Media player
In recent weeks many of you have been really creative in the ways that you have been keeping services running in your churches – and for some of you this has meant YouTube live streaming, or making greater use of uploaded media.
Now your videos hosted on other sites will be indexed in your sermon library.
You can either open an existing recording, or on the Media tab click 'Tasks' and 'Create an empty recording'. Under the 'Files' section, click the chain link icon to add your YouTube or Vimeo video.

Enter a title for the video, and the URL, and make sure 'Play in the media player' is selected.
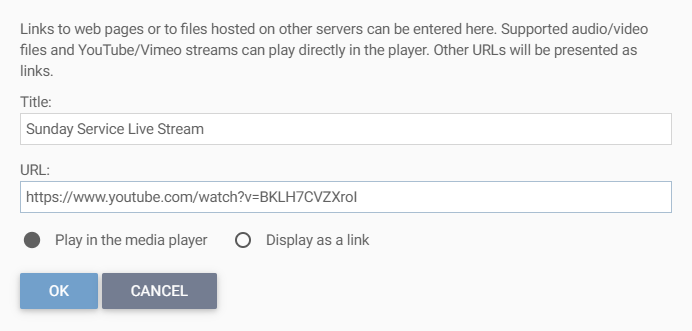
That's it! Your YouTube or Vimeo video will play directly in the media player, just like other videos uploaded on your site and can be controlled using the usual controls. This also provides a free option to save you incurring media costs when you upload media to our servers.
Add a link to another website
Sometimes you might want to include a link to a page on your website or another website – perhaps for more resources, or something that was referred to in the sermon. You can do this now too, just follow the steps above, but make sure 'Display as a link' is selected. Then the link will open in a new tab rather than in the player.
Only show related YouTube videos from the same channel
One of the downsides of using YouTube is that you are at the mercy of external links – and when you reach the end of a video, YouTube offers all sorts of suggestions about what you might view next. We've set an option that should restrict these suggestions to other videos from your own channel.