How to update the GATEWAY template
The Gateway template has four folders of images that are used on the homepage. These are located under the media tab when on the root group.
It's important that the images you upload are the correct size to enable the homepage to display correctly.
Editing the slideshow images
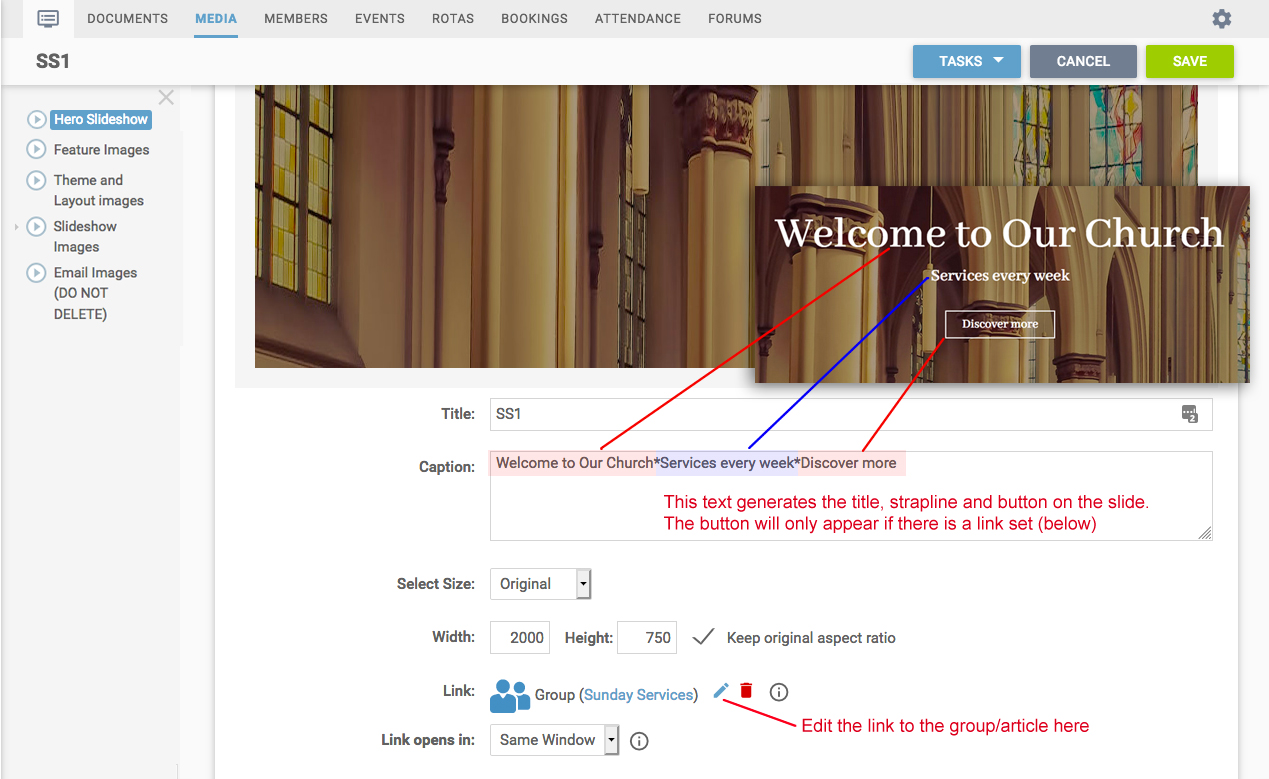
The slideshow images are in the ‘Hero Slideshow’ folder. You can add any images required to this folder. The standard size for these images is
2000 pixels wide and 750 pixels tall. The images can be taller if you wish but you must make sure they are all the same as each other, otherwise you will get a grey band showing under the shorter images. There is an article
here that shows you how to upload an image.

The caption on the image gives you the text and the button, these are separated with asterisks, so the first part is the title text, the second is the strapline and the final part is the button text. The button will only appear if there is a link on the image. See this
article for instructions on adding links.
Editing the feature images
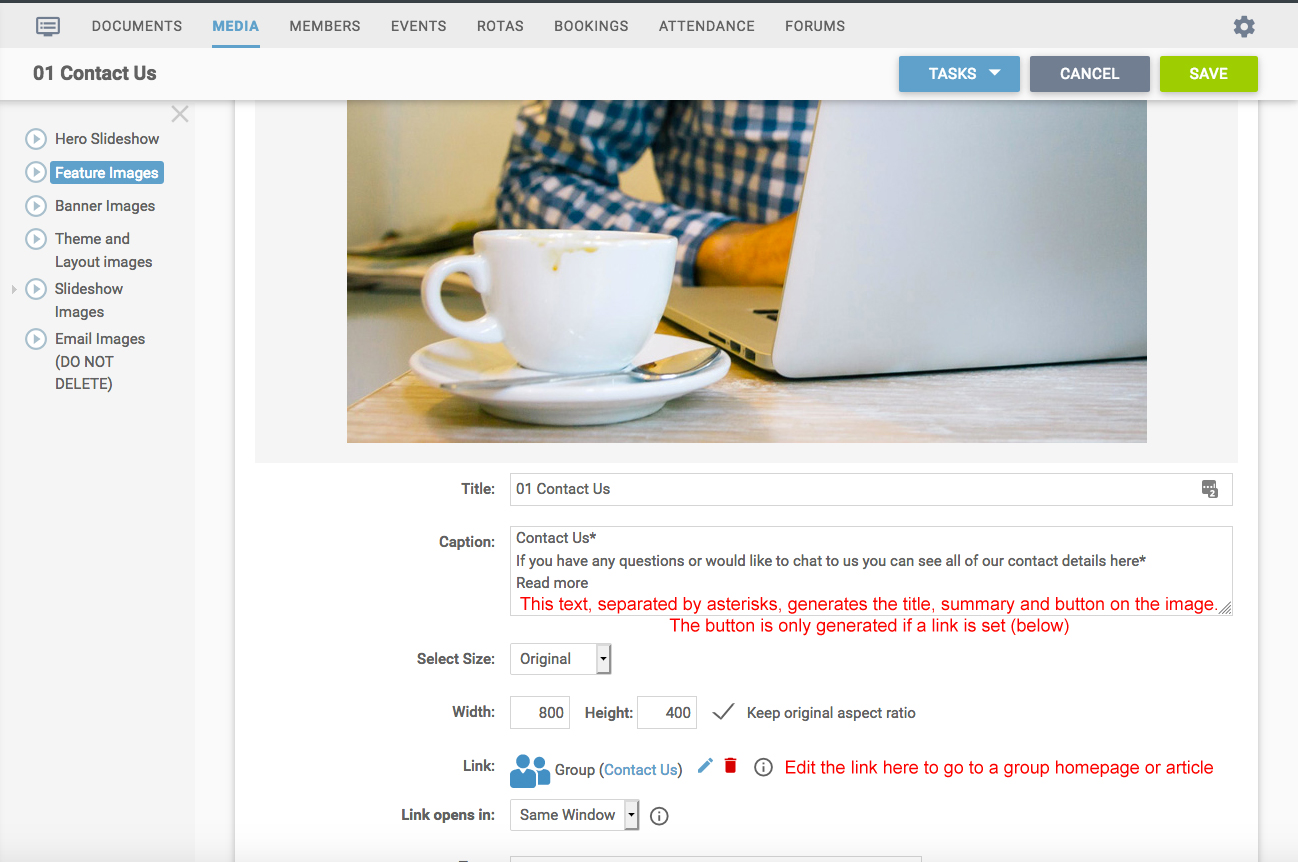
The second folder of images, 'Feature Images Top', are displayed under the 'A Warm Welcome to our Church' text. There are three images in this folder and they are
800 pixels wide and 400 pixels tall. The images are set up at this size so you can use them larger in other places without them losing resolution. You can add any new images to this folder and remove any that you don’t require. These are set up in the same way as the slideshow, you have a title, a summary and a button, all separated by asterisks.

The images in this group are displayed in alphanumeric order so if you want to change the display order you can renumber the images.
The section further down the homepage under the title 'Get Involved' is managed in exactly the same way but it's the 'Feature Images Bottom' folder that contains the images for this section.
Editing the content page banner images
The content pages on the Gateway template have a banner image that uses the group name as a title. These images are also the same size as the slideshow images,
2000 pixels wide x 750 pixels tall.

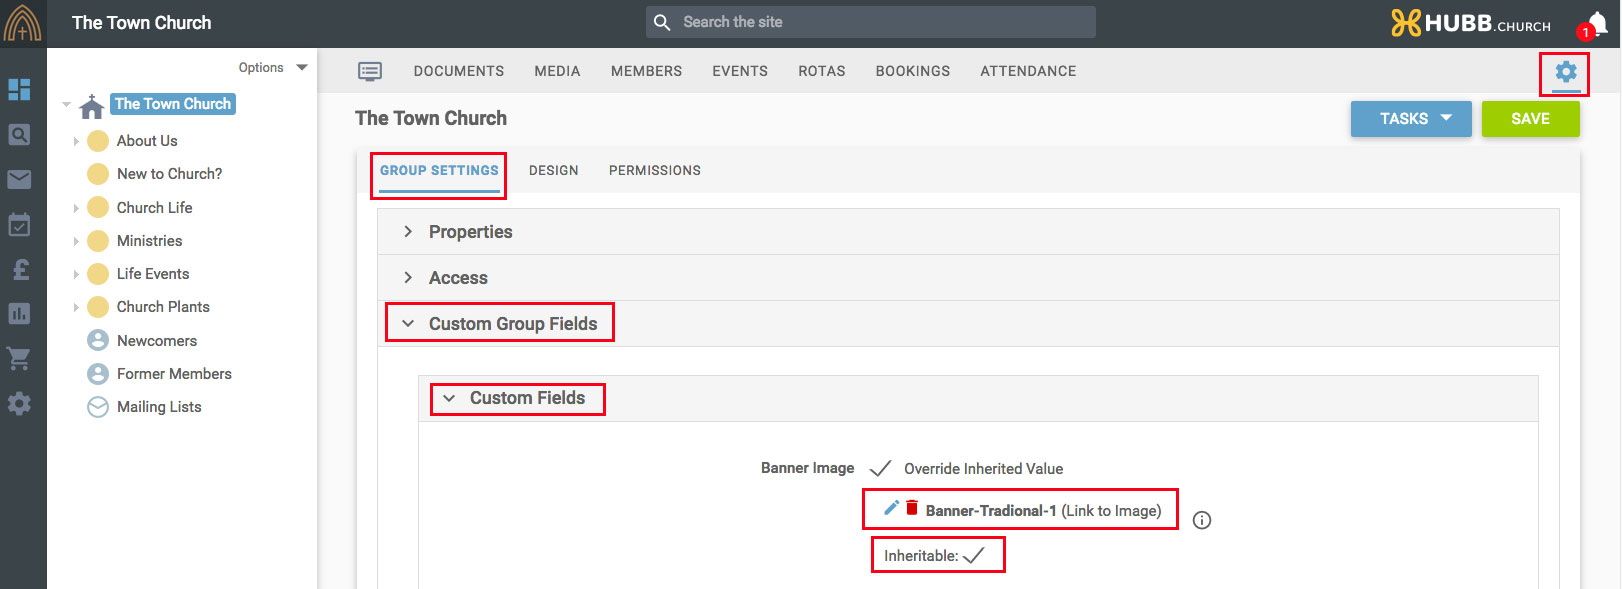
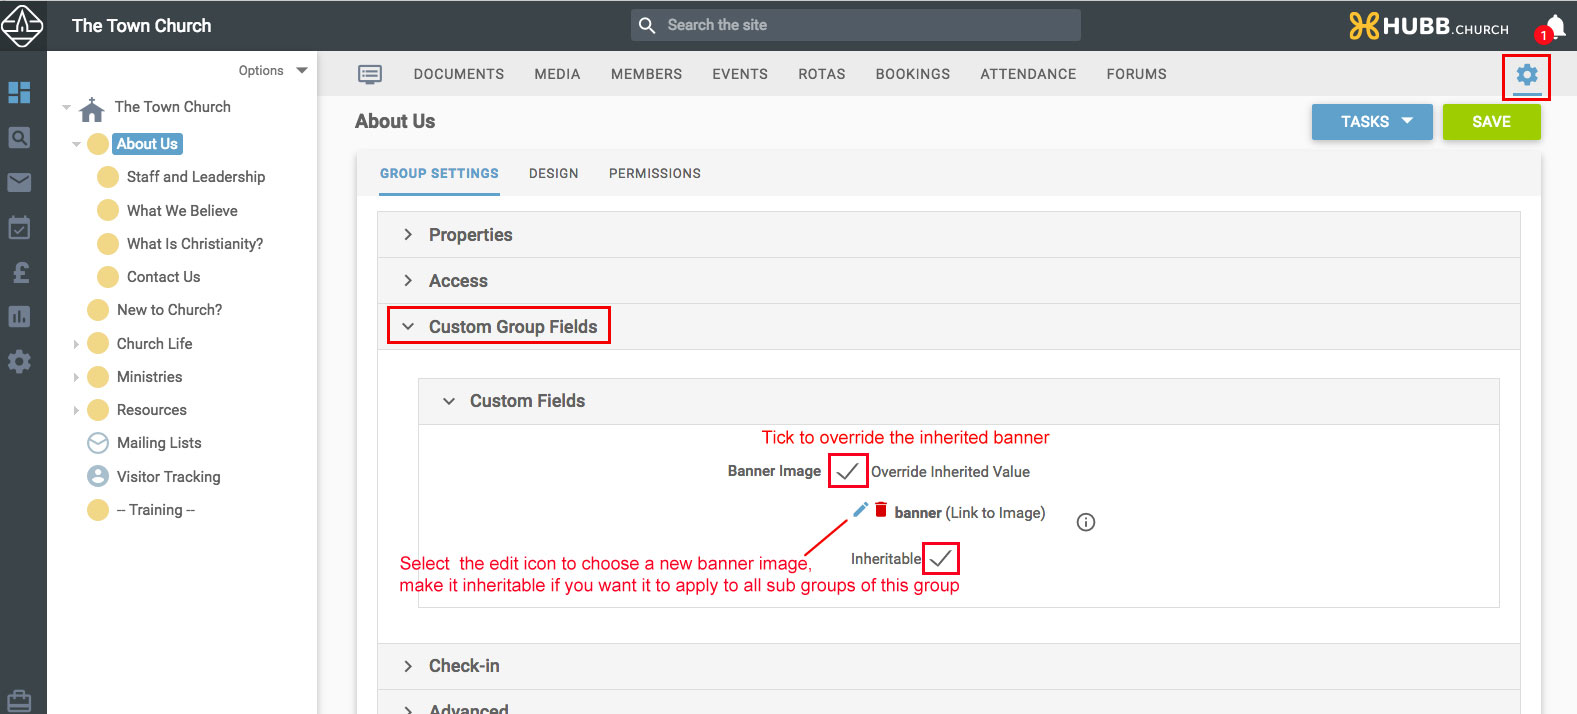
This image is set up in the root group but is set to be inherited to all sub groups. If you want a different image for a different group then you can override the image in each group. To do this you need to go to the groups settings via the cog icon on the top right, and select the 'Custom Group Fields' section. Make sure you're on the correct group for the new image, and select to 'Override inherited value' and click on the pencil icon to select the new image you want to display for this group. If you want this image to be inherited to sub groups of this group then you should click on the 'Inheritable' tick box.
